 Dansk
Dansk
 Deutsch
 Español
 Français
 Italiano
 Norsk
Norsk
 Polski
 Português
 Suomi
Suomi
 Svenska
Setting up DKIM & DMARC
Art. no. 216070627
DKIM (DomainKeys Identified Mail) is an email authentication method that protects against email forgery by allowing the sender to add a digital signature to the header of emails. This signature is verified with a public key published in the sender's DNS. Using DKIM improves email deliverability and protects brand reputation by reducing the risk of spam and phishing, making it an essential part of a secure email configuration.
To add DKIM, you need to add a setting at your domain name provider. If you do not know how to do this yourself, contact their support.
Add DKIM for the domain you use for emailing
- Start by creating your DKIM key in Abicart under Settings > Email > DKIM tab
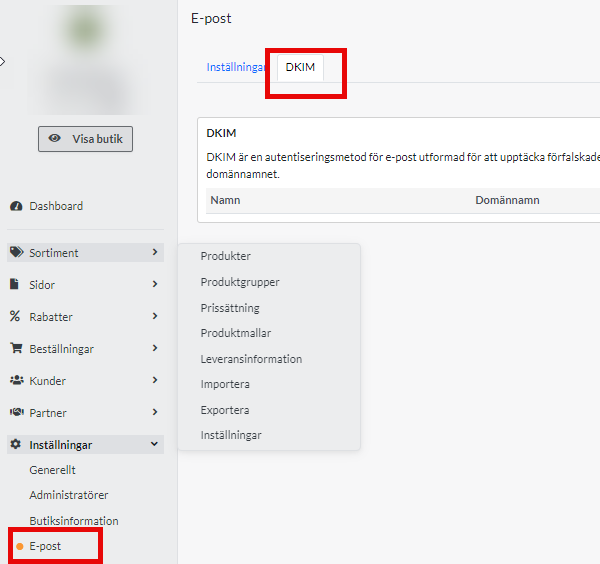
Click on Add and select the domain name you use for emailing, and a key is automatically generated in a unique format for your store, e.g. abicart20240131XXXXX._domainkey. - Close the pop-up window
- Click on the key to open a window with the settings you need to proceed. Copy the name and value.
- Log in to your domain name provider and add this information to your DNS as a TXT record.
More information on how to do this is usually available on your provider's help pages. It is often also possible to contact your DNS provider and let them know the contents of the name and value fields and they will help you with the implementation.
5. When DKIM is correctly set up at your DNS provider, it will say Registred = Yes in Abciart in the same place where you retrieved the data.
Keep in mind that these types of settings can take up to 24 hours to take full effect.
6. When registred has the value YES , click on your domain key and activate the setting so that the value in Active also changes from No to Yes.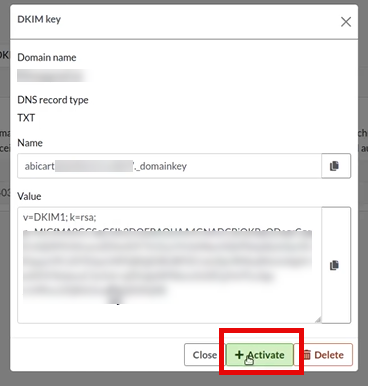
7. done!
Setting up DMARC
DMARC stands for "Domain-based Message Authentication, Reporting, and Conformance". It is an email validation method that helps protect your email domain from unauthorized use, such as phishing and spam. It helps reduce the risk of your emails being mislabeled as spam or someone else using your domain to send malicious emails.
A DMARC policy determines what happens to an email after it has been checked against SPF and DKIM records.
The DMARC policy determines whether a DKIM or SPF error results in the email being marked as spam, blocked, or delivered to the intended recipient.
Mail servers can still mark emails as spam if there is no DMARC record, but DMARC provides clearer instructions on when to do so.
You create a DMARC policy by adding a TXT record to your DNS with the name _dmarc.
Example: _dmarc TXT "v=DMARC1;p=reject" or _dmarc TXT "v=DMARC1;p=quarantine"
p = reject means that mail is not received at all, p=quarantine means that mail is received but will probably end up in the spam folder.
If you want to receive reports from mail providers about mail that does not meet the DMARC policy, you can add this to your DMARC policy as follows:
v=DMARC1; p=none; rua=mailto:email@example.com;
There are several DMARC generators you can use if you wish, such as these: https://dmarcian.com/dmarc-record-wizard/ Try our Quick Record Wizard.
See also Add SPF record
 with Abicart