 Dansk
Dansk
 Deutsch
 Español
 Français
 Italiano
 Norsk
Norsk
 Polski
 Português
 Suomi
Suomi
 Svenska
9 easy steps to get started with your webshop!
Art. no. 216070151

In this manual we will take you through the 9 most important steps to get your sales started!
The following points are the subject we are going through in this manual.
There will be links to more in-depth pages on each step.
Content
Add Product categories
Add Products
Add and edit your Theme
Add Payment Methods
Add Shipping methods
Terms and conditions
Sign the GDPR agreement
Add a Domain name
Go Live!
Add Product categories
We recommend that you start by adding product groups, since they make up the menu.

Follow these step to add product groups:
- Head over to Catalogue, on the left side.
- Click on Product category
- Click on Add your first product group
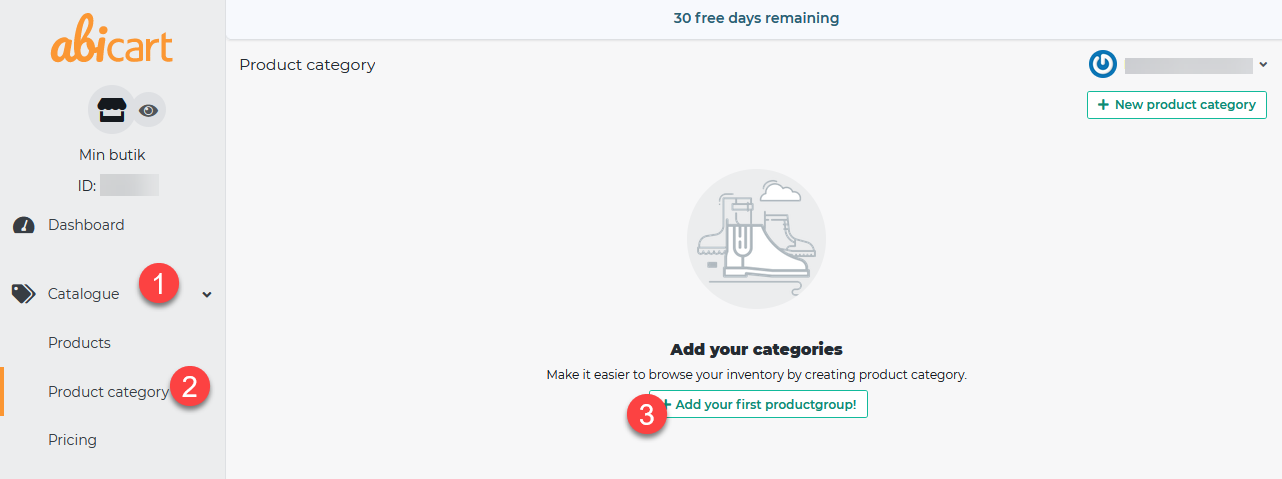
- Go thorough the steps, and fill in the fields*
- You can present every product category with images and an informative text*
- Finish of with Add
*We take you through these steps more in-depth in the manual linked below.

Click the link below to get more details on each step.
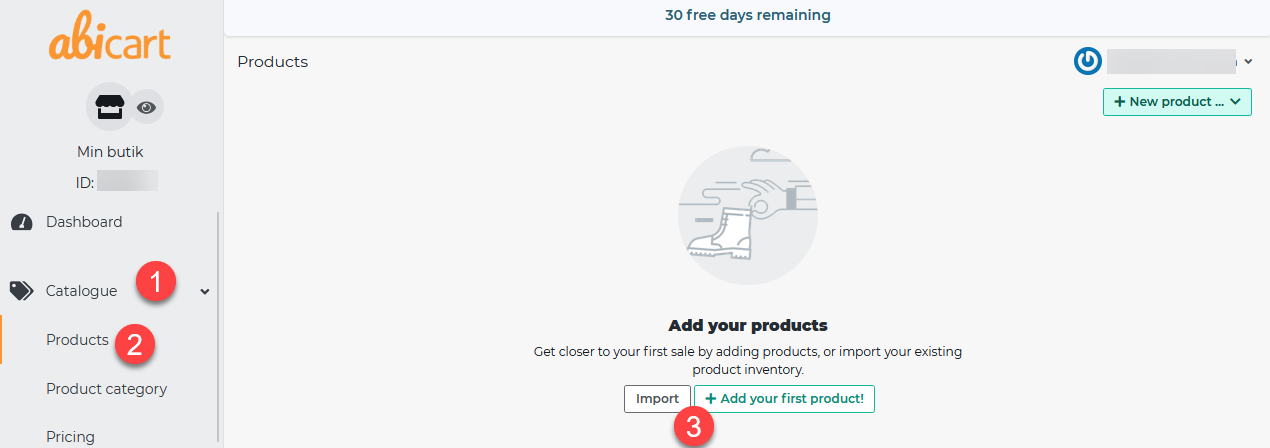
Add Products
You can choose to add products manually or via an import file.
- Head over to Catalogue, on the left side.
- Click on Products
- Choose Import to use a file or press Add your first product to add manually.
Click the link below to get more details on each step.
User manual - Products
User manual - Product import with file
Add and edit Theme
Today there are 8 different themes to choose from, they each have a different design.
Choose the one that suit your vision the best.
- Head over to Store design, on the left side.
- Click on Themes
- Click on the Theme templates tab
- Add: Choose the theme you want for your store.
Demo: Get a peak on how the theme looks in live.
Read more: Click here to get more information about that theme.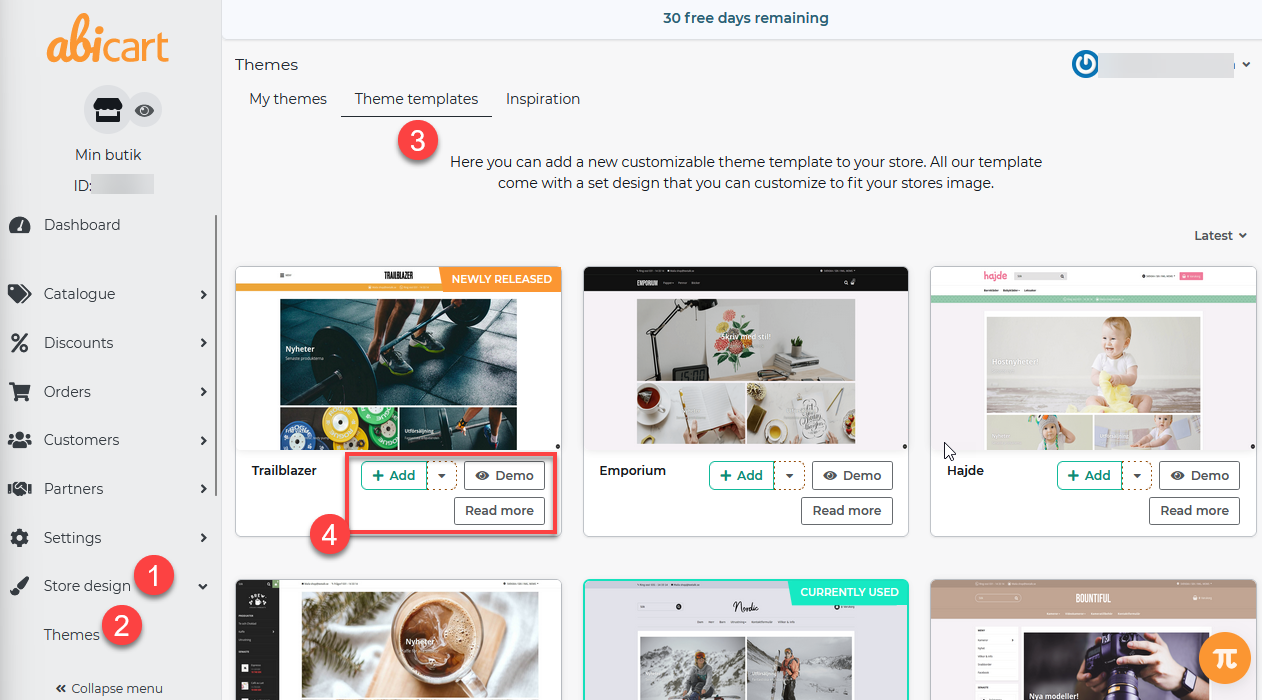
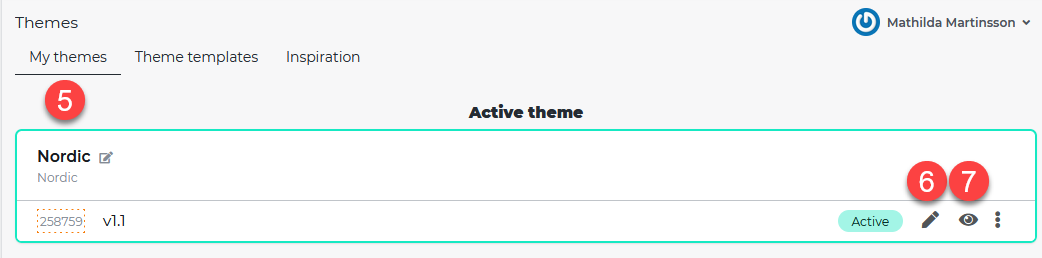
- In the tab My themes you find your added themes, this is also where you edit them.
- Click the Pen to edit..
- Preview a theme by click on the Eye.
Tip!
Copy your existing theme on the three small dots, and make change to your copies for seasonal campaigns. This way you never have to make campaign changes to your original theme instead you can create one theme for Black Friday, Christmas, Easter etc.
Click the link below to get more details on how to edit your theme.
Add payment methods
We are partnered with a range of different payment methods, all over them world.
Here you'll find all of our payment methods
Reminder!
Always start by signing an agreement with the payment company, some agreements can be signed via the Dashboard page.
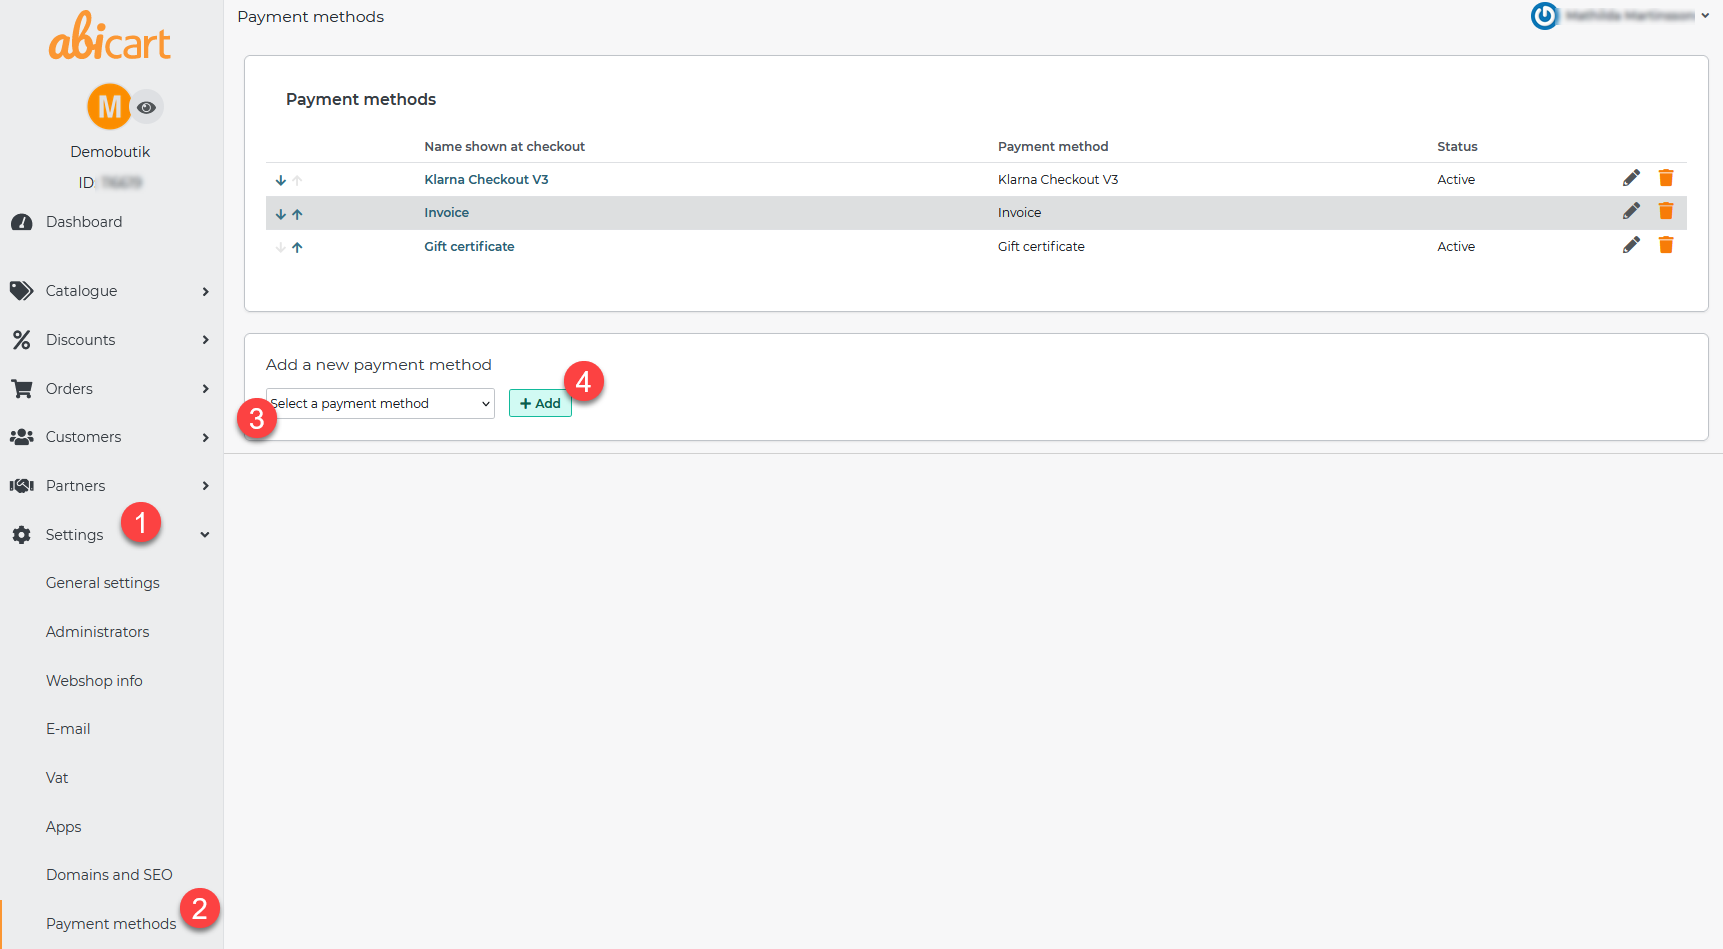
- Head over to Settings in the left side menu.
- Click on Payment methods.
- In the list "Add a new payment method" select the payment method you wish to add.
- Finish off by clicking Ad.
For more information regarding activation and other settings, please visit the link below and look for the payment method of your choice.
Click the link below to get more details on how to add payment methods.
Manuals - Payment methods
Add shipping
This is where you add information about the different shipping you offer your customers.
Reminder!
In Abicart you add the information about what shipping you are offering, it's not an integration towards the company it self. The agreement is signed separately and directly with the shipping company.
- Head over to Settings in the left side menu.
- Click on Shipping
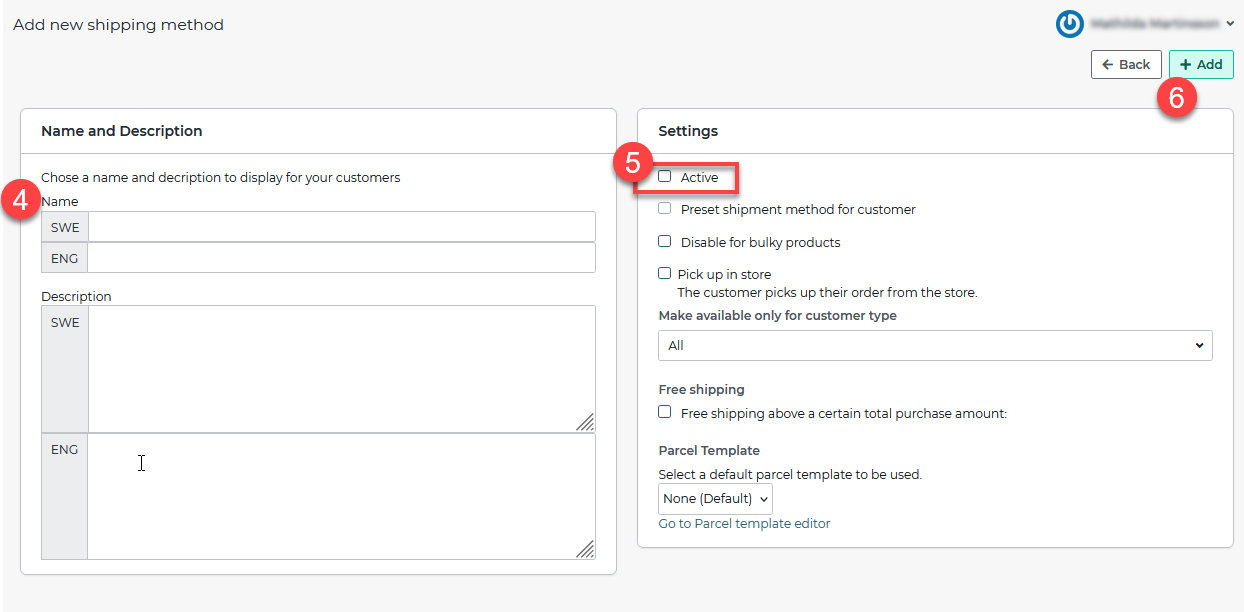
- In the top right side corner you click +New shipping method.

- This is where you name the shipping methods for example UPS.
- Remember to check the "Active" box for the method to be visible to customers.
- Finish of by clicking on Add
For information regarding shipping rates, fees, connect rate for addresses/countries/groups visit the link below.
Manual - Shipping methods
Add terms and conditions
It is important to let your customers know about what terms and conditions there are in your store. This could be what your return and shipping policies are. In Abicart we have a template ready to use (only in Swedish as of now).
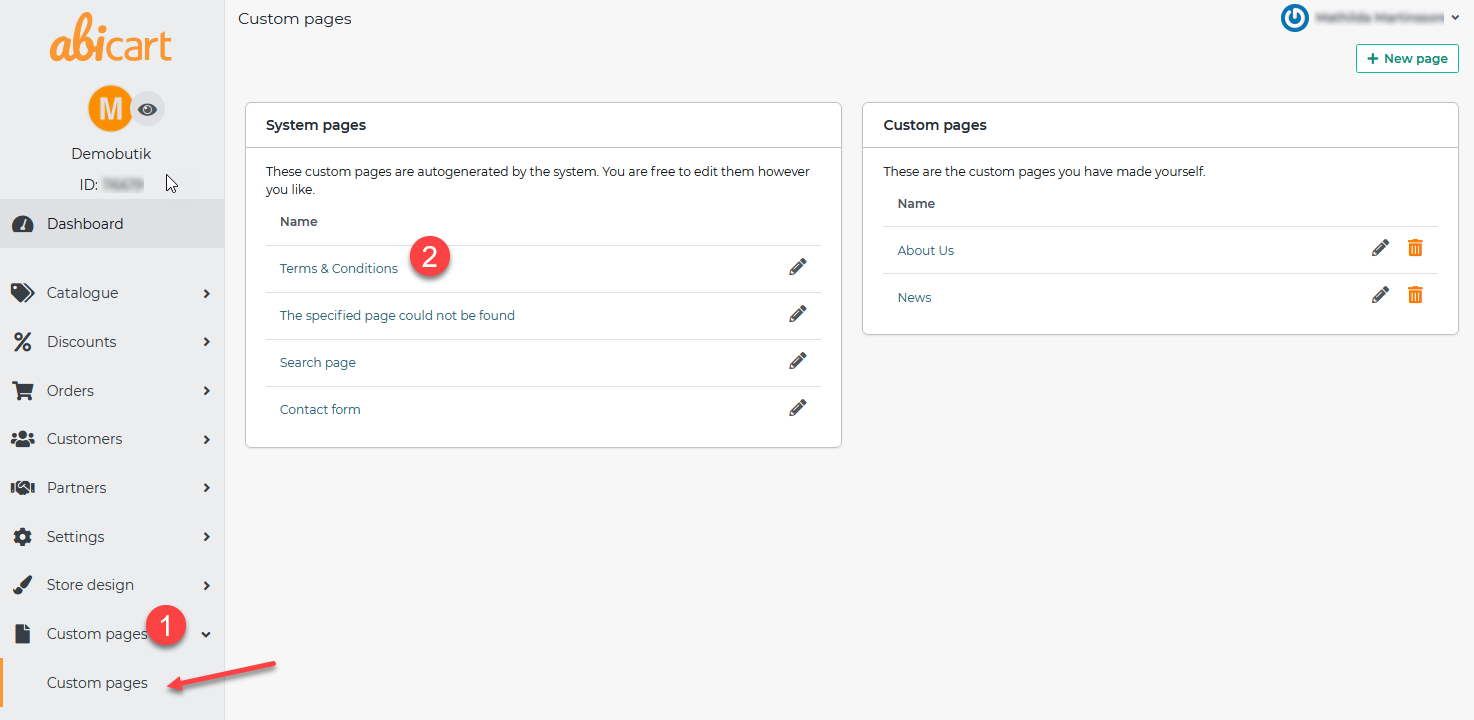
- Head over to Custom pages in the left side menu.
- Click on Terms & condition
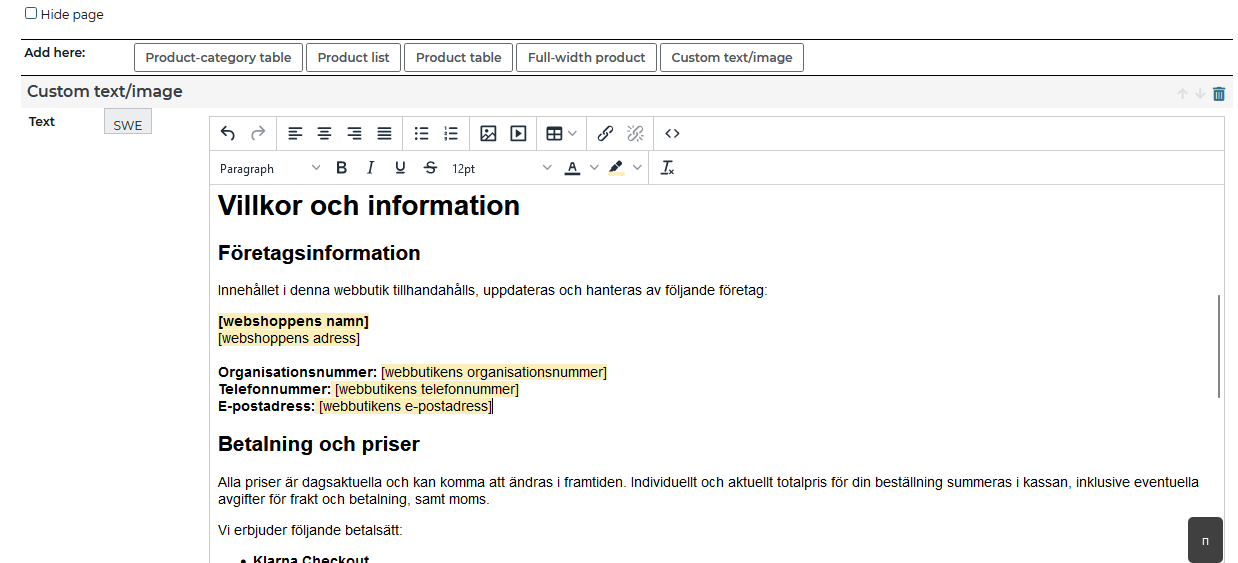
Template for Terms and conditions (In Swedish as of now):
The template is created based on what webshops generally use as their terms and conditions.
The yellow fields shows text that you can replace with your own, for example your email.
In the template there are ready to use headlines. Go through and edit the text under each headline to make sure the text works for you companies terms and conditions.
Reminder!
You need to manually make your Terms and conditions page visible.
In the manual below we will show you how to do that.
Sign GDPR agreement
- Head over to Dashboard at the top of the left side menu.
- Click on "Sign GDPR agreement" in the checklist.
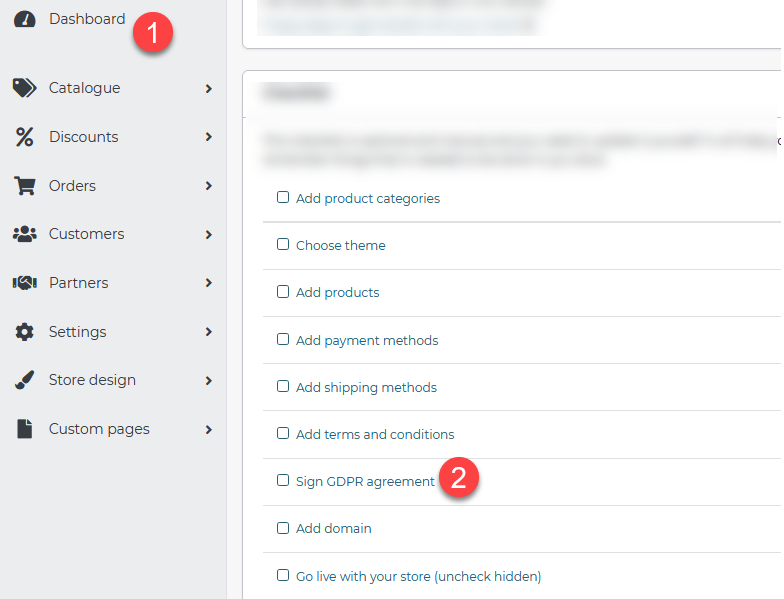
- Choose to Sign on another device or Sign on this device.

In the manual below you will find more information about GDPR for store owners.
Manual - GDPR
Add domain
The domain name is the adress to your store i.e. www.abicart.com.
You will seem more credible to your customers if you have your own domain.
Remember!
Start of with buying your domain name. You can do that via a lot of different companies, Loopia and One.com are two of them.
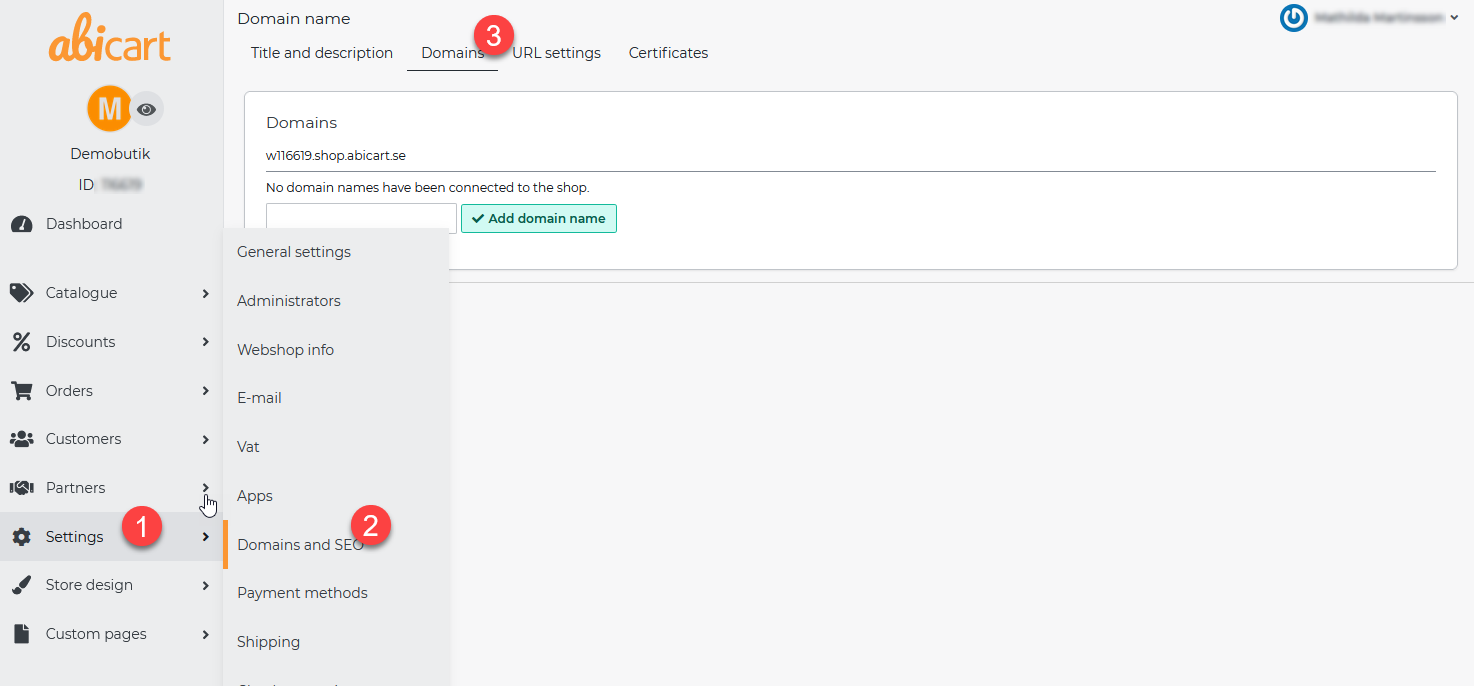
- Head over to Settings in the left side menu.
- Click on Domains and SEO
- Click the Domains tab
- Write your domain name and end with Add domain name.
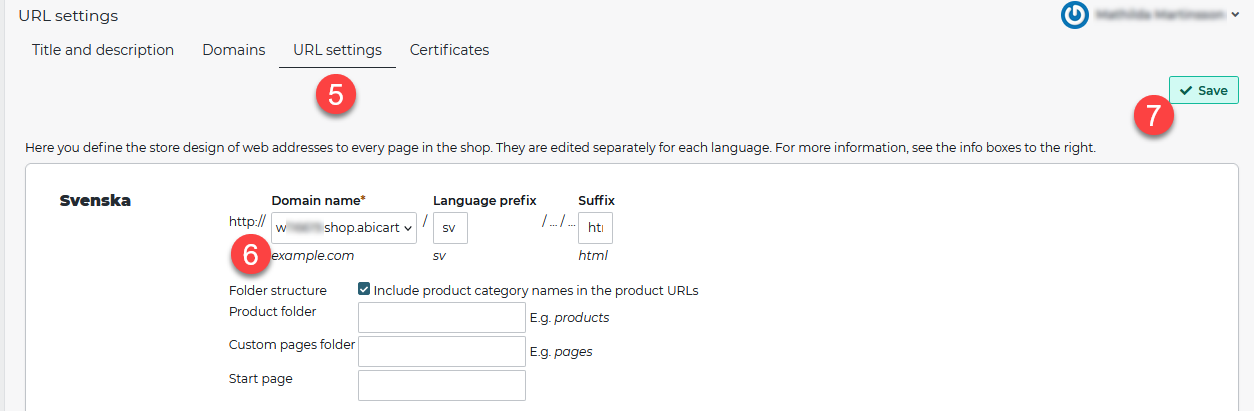
- Head over to the URL settings tab
- In the list, next to "https://", choose the domain you just added.
- Finish of by clicking on Save
In the link below you can find more detailed information on how to re-direct your current domain name.
Manual - Add a domain to your store
Go live with your shop
Now it's time to go live with your webshop, to make it visible to people searching for it.
- Head over to Settings in the left side menu.
- Click on General settings
- Untick the "Hide shop"
- Finish of by clicking on Save
Search Engine Optimazating 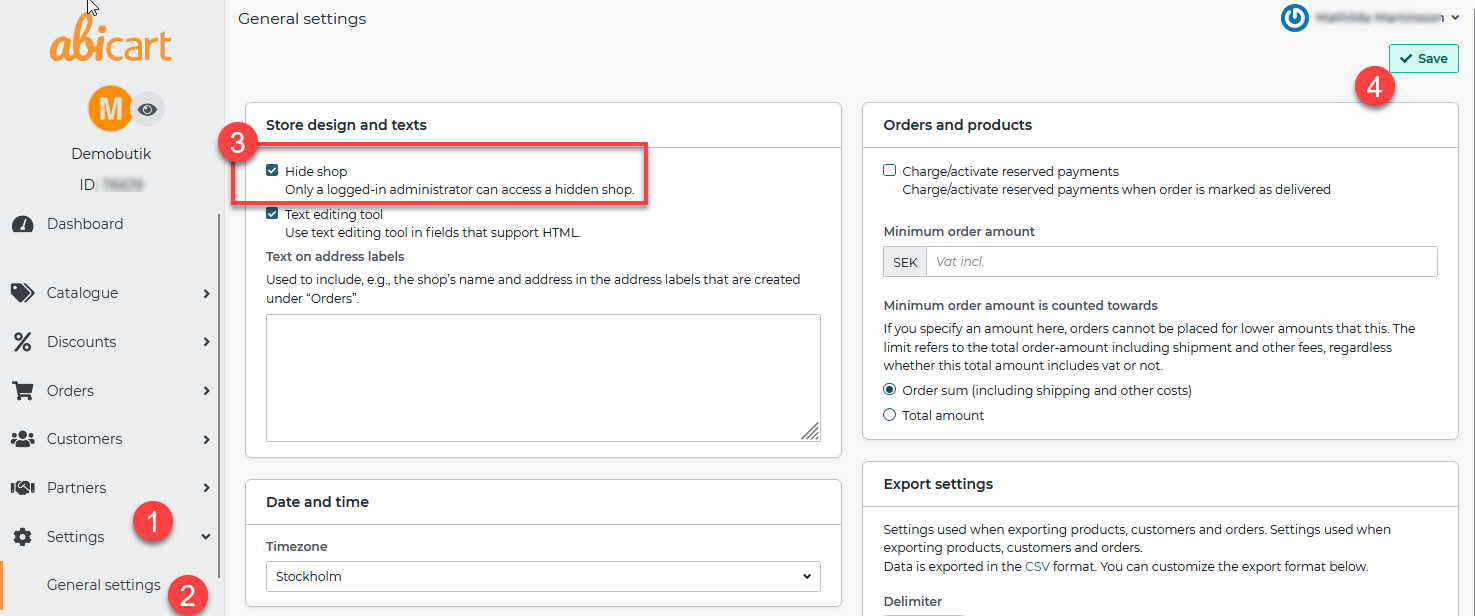
 with Abicart