 Dansk
Dansk
 Deutsch
 Español
 Français
 Italiano
 Norsk
Norsk
 Polski
 Português
 Suomi
Suomi
 Svenska
Adding fact boxes to an article
Art. no. 216090277

Adding fact boxes to an article
Preparations
Start by logging in to Prenly Workspace.
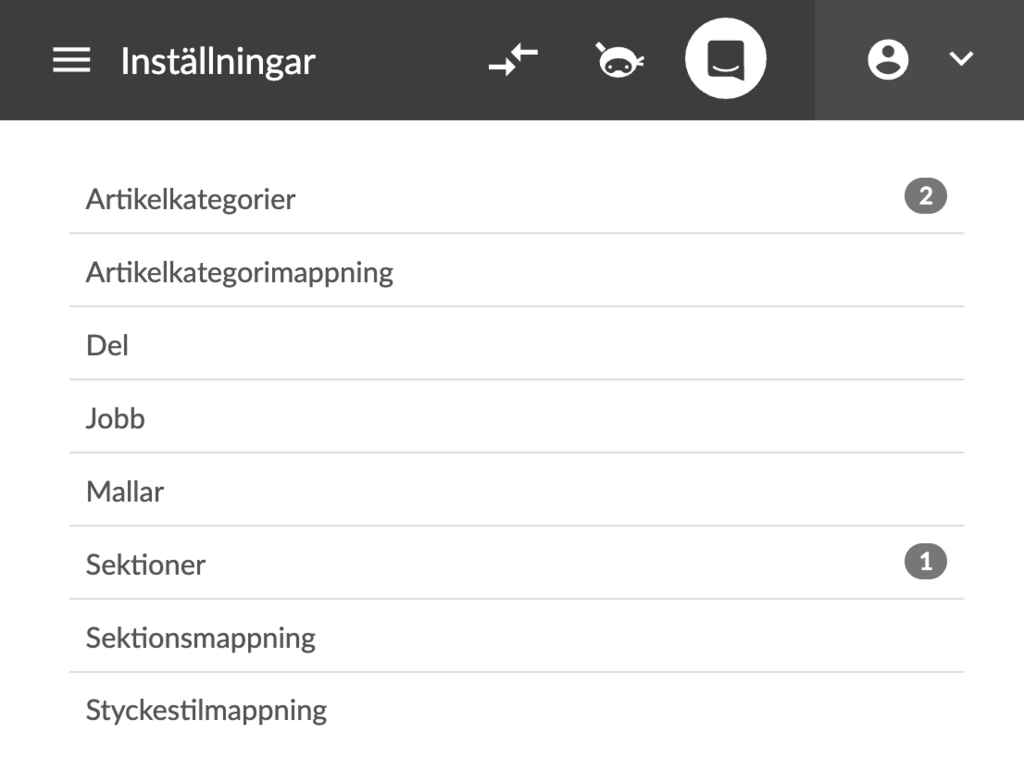
Select a title in the left menu and click on Settings (a gray box or gear icon) in the top right corner.
You will now see a list.
Click on Article Categories (at the top).
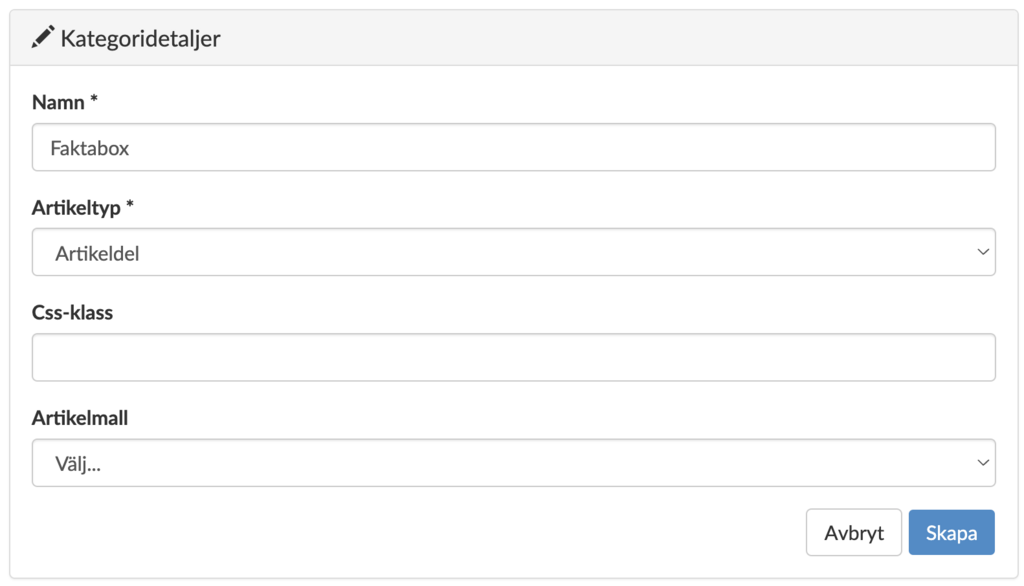
Then click on the Add Article Category button.
Give your item section a name (for example, "Fact Box") and set Item Type to Item Section.
Click Create.
Create or locate the article that will have a fact box
Navigate back to the article where you want to create your fact box, either if you want to create a new article that has a fact box or an existing article where you want to add a fact box.
Open the issue where this article should be placed or is placed. The fact box will now be created separately, and then linked to the article where you want it to appear.
Create the fact box
Click on New content and New article.

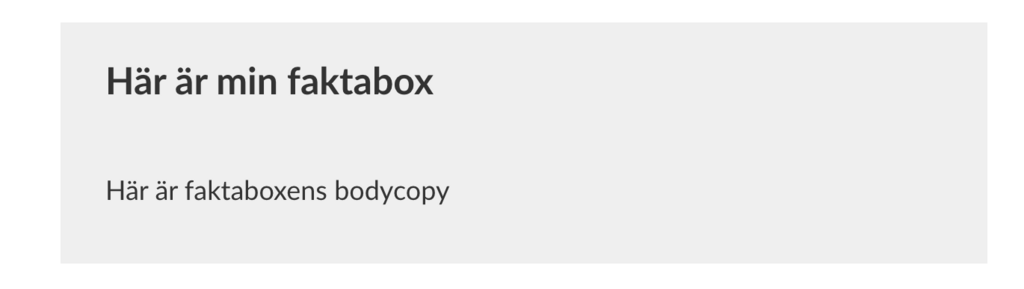
Create the content for your fact box, i.e. write the title, text and/or add media files.
At the top right there is a menu/drop-down. Click on it and select your new article section (in the example it was named 'Fact Box').

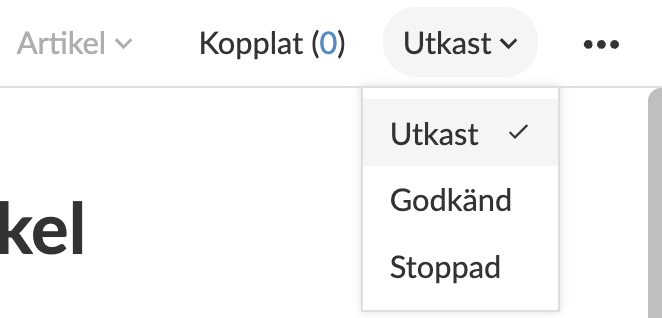
Once the fact box is ready, navigate back to the article that will receive the fact box. Make sure the article has the status Draft, if not, change it to this.
Then click on Linked. Here you can unfold the section you have named, for example "Fact Box" and select your newly created fact box by clicking on the + (plus sign).
Once that is done, you can close the modal box.
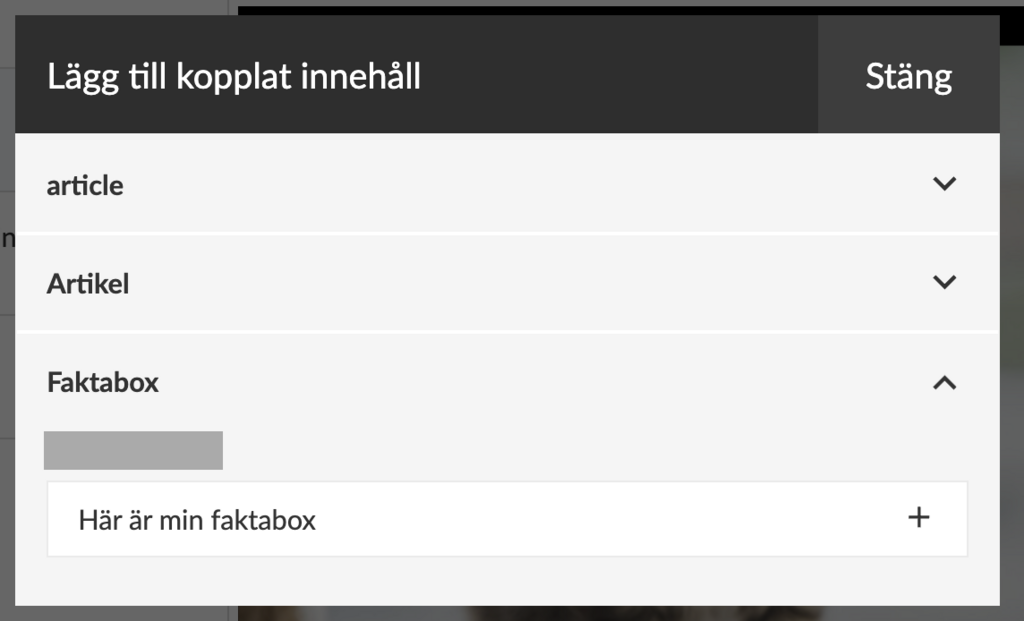
At Linked you should now be able to see a one (1) and when you click on Linked you can see your fact box. Click on the pencil to edit your fact box.
Change the status from Draft to Approved and publish the article. Navigate to the article in your application, and when you open the article you can see your fact box.
 with Abicart