 Dansk
Dansk
 Deutsch
 Español
 Français
 Italiano
 Norsk
Norsk
 Polski
 Português
 Suomi
Suomi
 Svenska
Languages
Art. no. 216070241

Enable and manage multiple languages in the store.
How do languages work in Abicart?
When you start the demo shop, there is one language active and it is Swedish. If you want to have more languages in the shop, you can easily activate this under Settings -> Languages.
What should I keep in mind when activating multiple languages?
Standard words and phrases in for example the checkout are already translated but keep in mind that all products, product groups, custom content and themes need to be translated. You can do this manually or via import. More on this later in this article.
Short film: enable multiple languages in your webshop
Enable multiple languages
Go to Settings -> Languages.
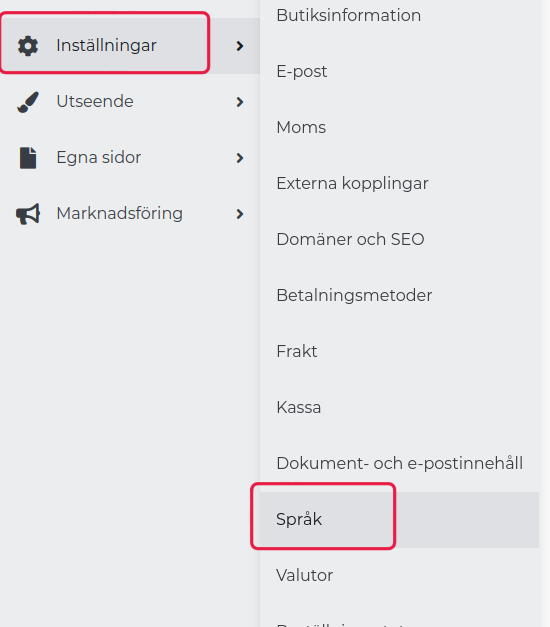
In the "Language settings" block there is a list of all languages. Select the language you want to add and click "Add", for example English.
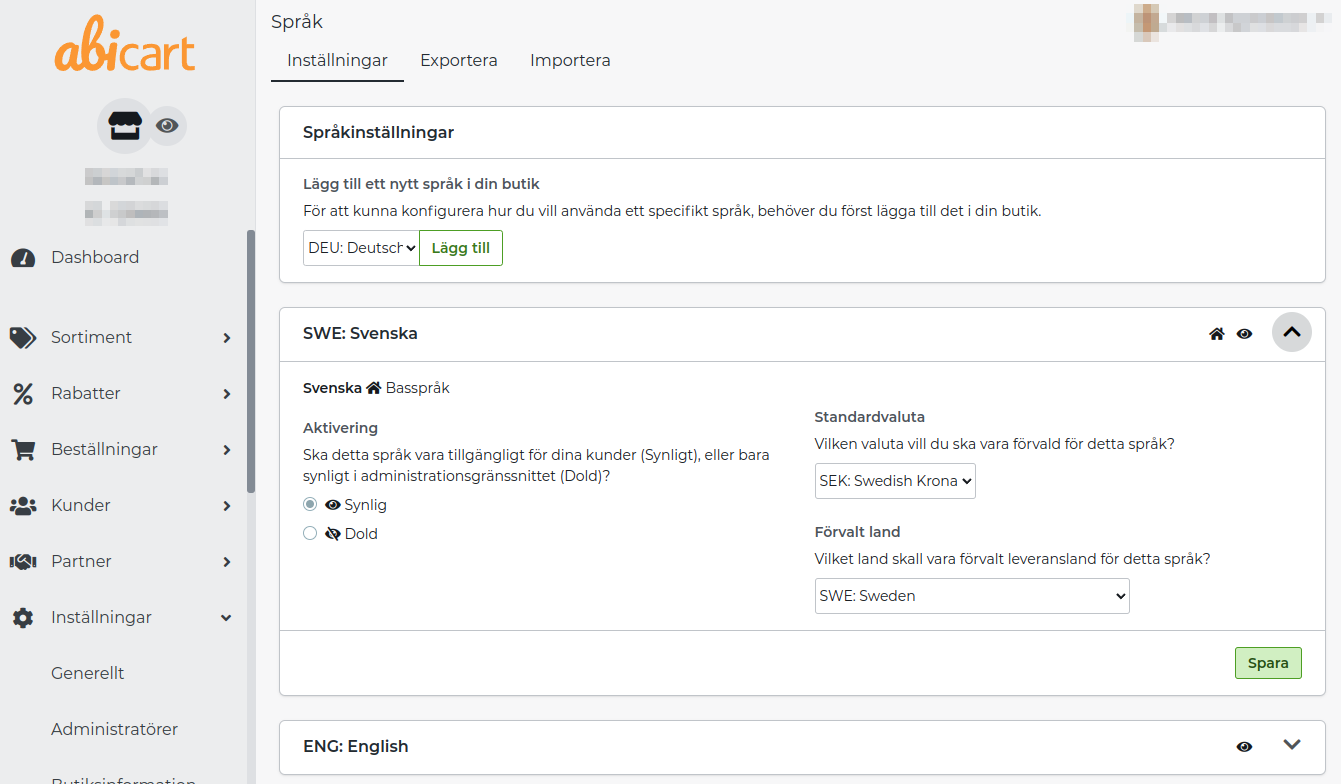
There is now a new block under English called "ENG: English". The language is hidden by default and the reason is to be able to translate the language before it is activated. There are also some other settings you can make:
» Ange som standard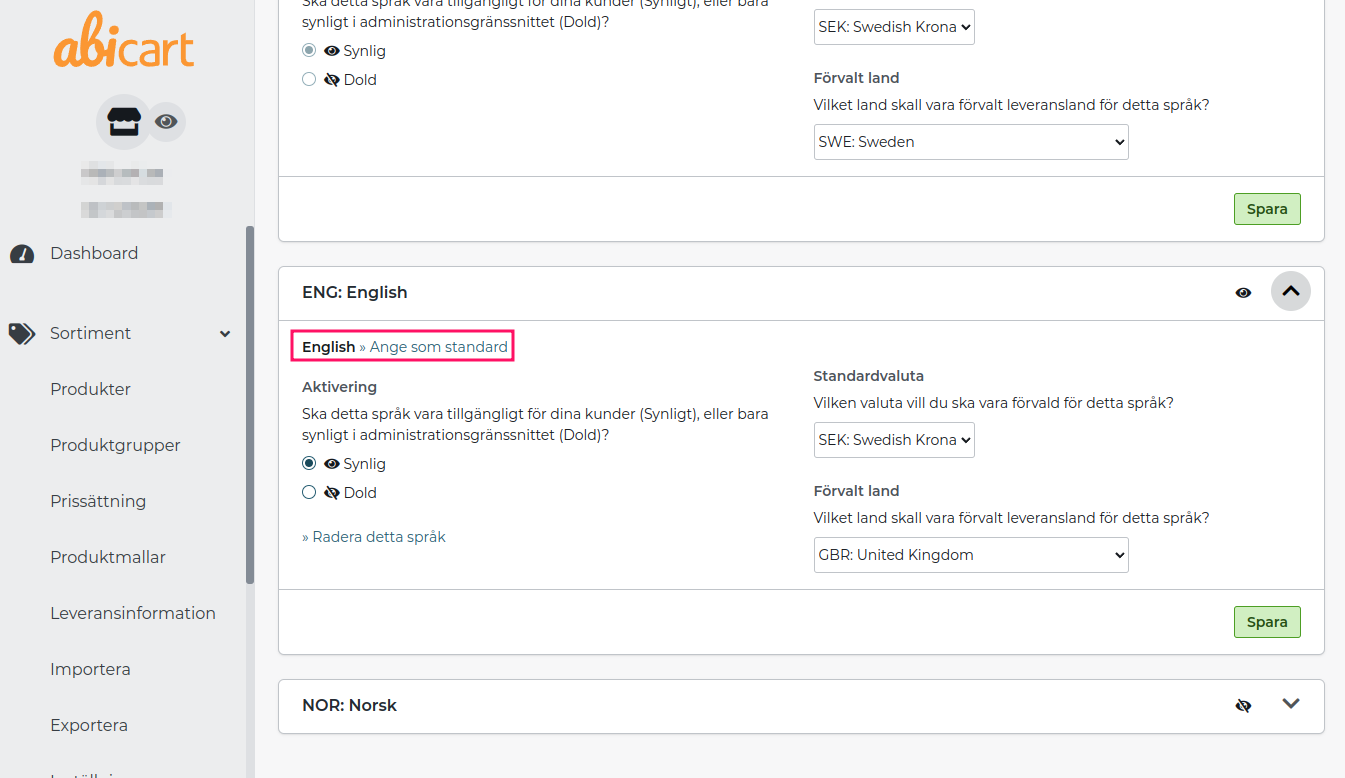
Activation
Choose to activate and hide the language. If hidden is selected, only the language is shown in admin.
Do not activate a new language until all products, product groups, custom pages and the theme have been translated.
Default currency
Select a default currency for the selected language.
" Delete this language
A link to delete the language. All translations for this language will be deleted if you delete the language.
If you activate a new language and do not translate all products, the product will still be displayed but the name and description will be empty. You cannot therefore exclude certain products in a particular language but all products will be displayed in all languages.
Use export and import to translate a new language
If you have a lot of texts to be translated, it may be easier to do this in Excel than to go through the pages manually one-by-one in the administration. Then you can export a text file with the product ID and the base language and then enter the translations in a third column.
Go to Settings -> Languages -> "Export" tab.
Here are some selections you need to make before the file can be exported.
Which language do you want to translate from?
If you have the shop in Swedish and want to add English as a new language, select "Swedish (base language)" here. Then the Swedish texts will be displayed in a column in the file so that you can easily see which text will be translated into English.
Which file format do you prefer?
Here you have to choose which format the file should be exported to. There are three different ones to choose from:
CSV - This is the most common format for a text file and can be opened in any spreadsheet program and works on Windows, Mac and most other operating systems.
ODS - If you use the free Libre Office (or Open Office) software, you can choose this format.
XLSX - If you use Excel, choose this format.
If you are sending your texts for translation to a translation company, you should choose CSV as the format. If you are translating the texts yourself and use Excel as your spreadsheet, choose XLSX as the format.
What data do you want to include?
Select the different properties of the store that you want to translate. If you have several different themes, you can choose between all of them at the bottom. By default, the active theme is exported.
Then click on the export button and save the file on your computer.
What does the file look like and how do I translate?
Once you have exported a file and opened it in Excel (or whatever spreadsheet program you use), the file should look something like this.
It contains three columns:
Key
This is the ID number that identifies the text. The text in this column must not be changed.
Content
Column B contains the basic language texts. These are the texts to be translated.
Translation
In column C you enter the translation of the texts in column B (content).
Once the translation column has been translated, save the file.
Importing translations
Once you have translated a file, you can import it under Settings -> Language -> Import. There is a choice to be made here first.
Choose language to import
If you have translated English and want to import it as a new language, you must first add the language under Settings -> Language (it may still be hidden). Then select the language from the list here.
Select the file you want to import
Select the file with the translation from your computer and then click on the import button in the top right corner.
Then just wait for the import to finish.
 with Abicart