 Dansk
Dansk
 Deutsch
 Español
 Français
 Italiano
 Norsk
Norsk
 Polski
 Português
 Suomi
Suomi
 Svenska
Send a push notification
Art. no. 216099779
Send a push notification
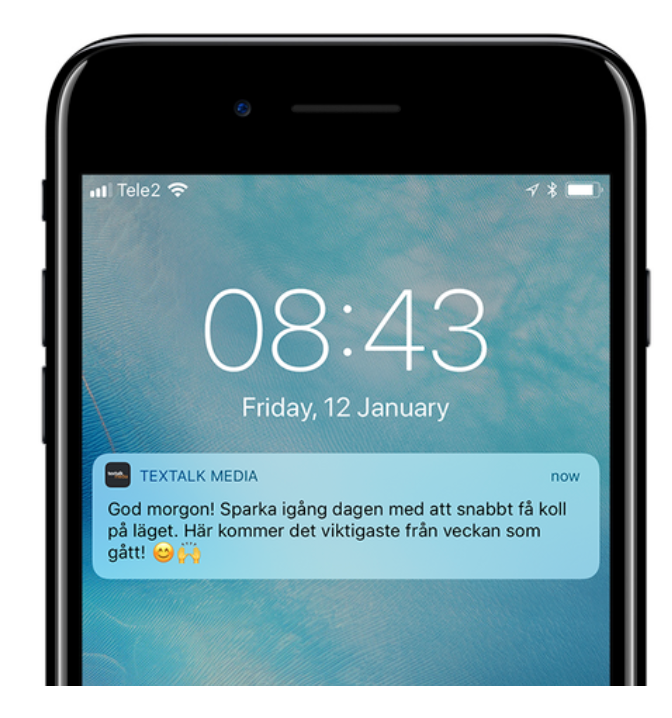
From the Prenly Editor, you can send an unlimited number of push notifications to your readers' iOS and Android devices. This article will help you get started.
When a user clicks on a push notification, the app opens and displays the page you set up when you created the push notification in Prenly Work Space.
To send a push notification
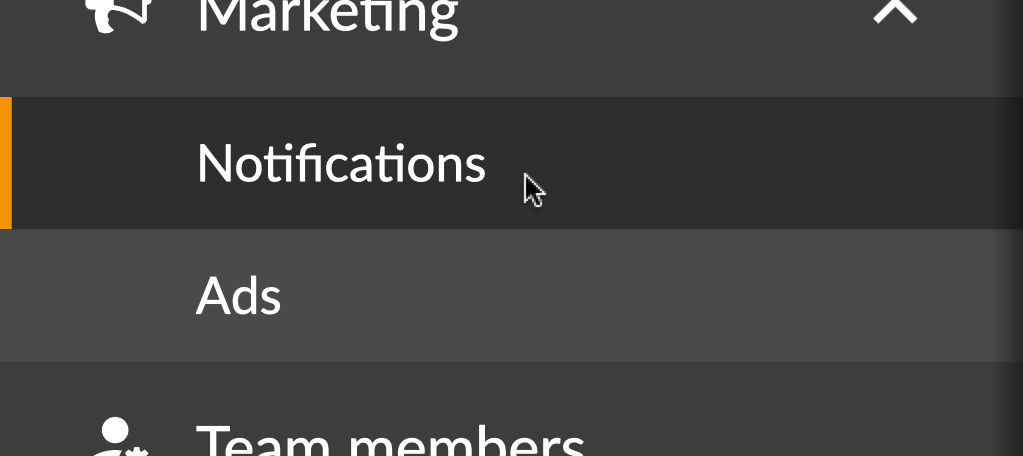
1. Click on the "Marketing" drop-down menu and select "Notifications"
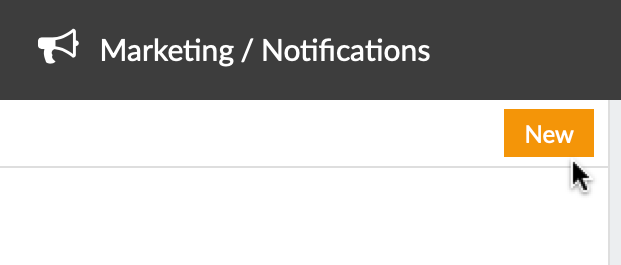
2. Select "New"
3. Name your push notification
Name your push notification to make it easier to find it later. This name will not be visible to the user.

Tip! With the tab key on your keyboard, you can easily jump to the next field, for example from "Name your push notification" to "Which applications should the push notification be sent to".
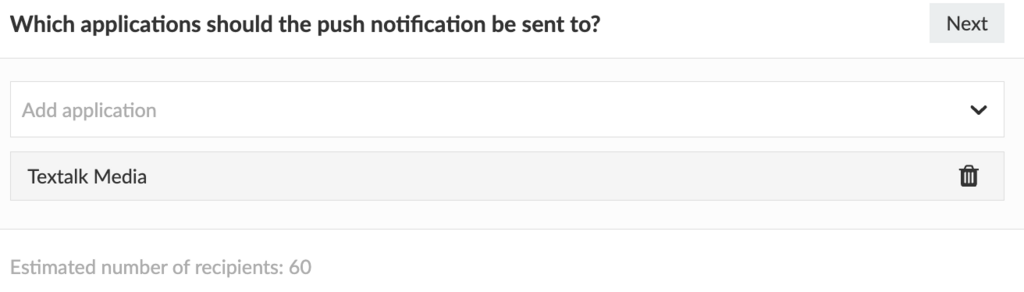
4. Select the applications to which the push notification should be sent
As your notification can be sent to multiple applications, you need to choose which applications will deliver your push notification.
If you choose to send the push notification to more than one application, in the next step you will only be able to choose to open the application itself, not for example a specific number or article.
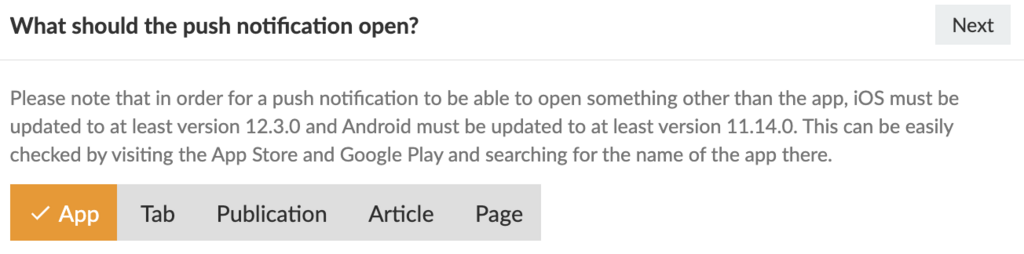
5. Choose what the push notification should open
Choose what the push notification should open when the user clicks on it. There are five possible choices: App, Tab, Publication, Article, Page.
If the user has not updated their app (iOS app version 12.3.0 or later and Android app version 11.14.0 or later), the user will receive your push notification as if it was sent with the App option.
If you are unsure which app version you have for your app, visit the App Store and Google Play and search for the app where you will find the latest published version number.
App
If you select App, simply the application itself will open.
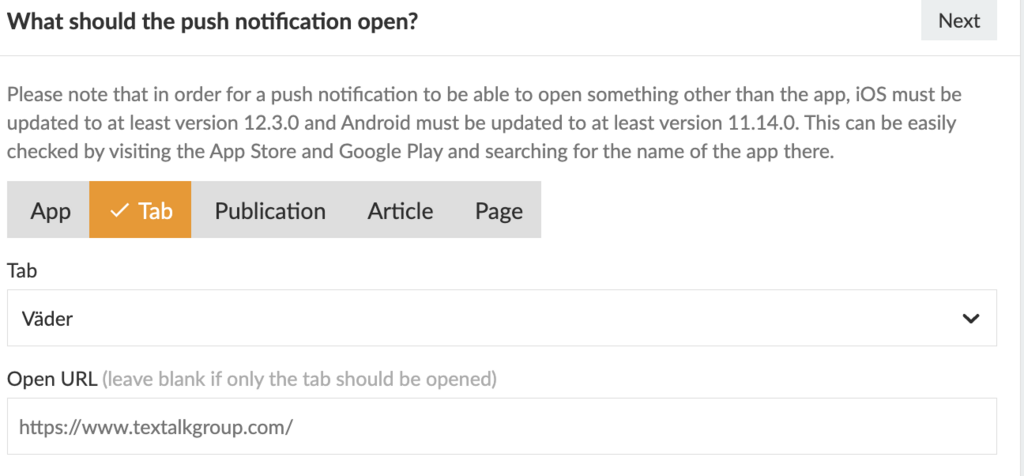
Tab
If you select Tab, a new menu will appear where you can choose which tab of the application to open.
If you select a tab that displays content from a URL, you also have the option to enter a specific address, for example to an article. Note that the article needs to be on the same domain as the tab is set to display. That is, the article you want to display must be available on the same domain as the one pre-filled in the field. If you only want the tab to open, you can simply leave the specific URL field blank.
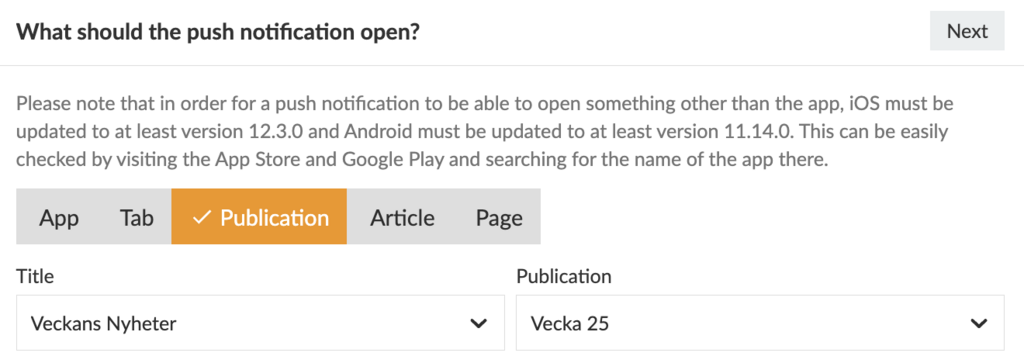
Publication
If you select Publication, you first need to select the Title you want to send the push notification to, and then the publication to open.
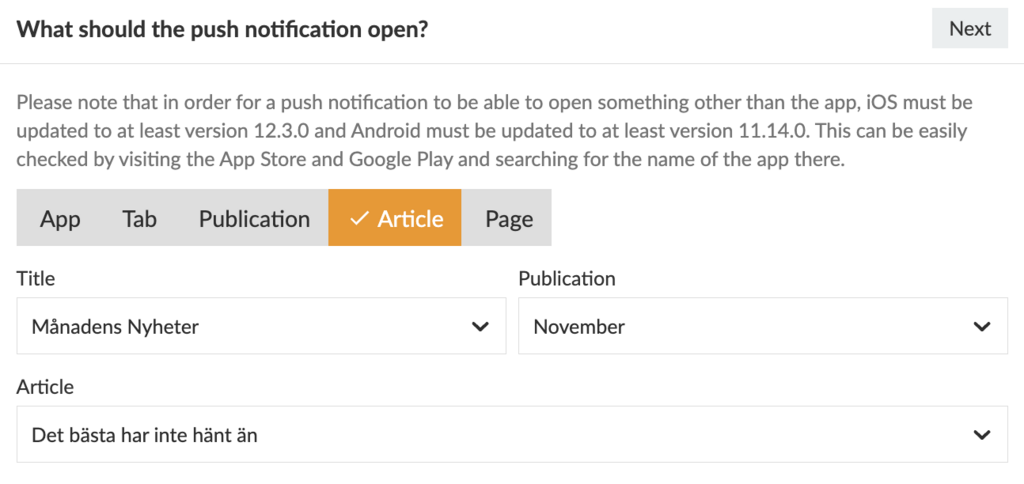
Article
If you select Article, you first need to select the Title, then the Publication and then the Article to open.
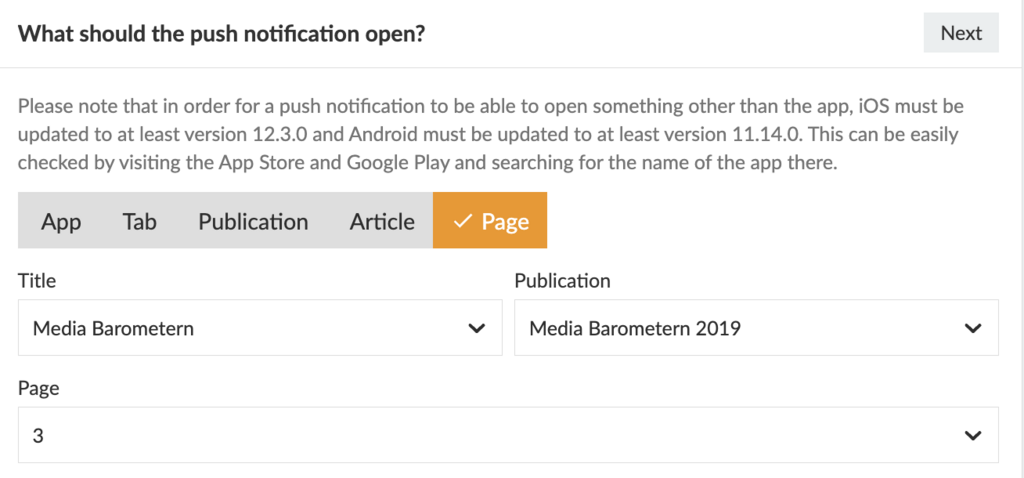
Page
If you select Page, first select the Title and Publication, and then the page to be opened.
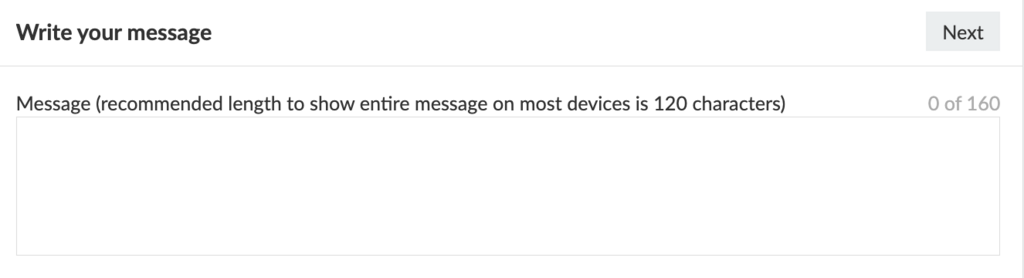
6. write your message
Write your message. Keep the message under 160 characters to ensure readability on older devices. Feel free to use emojis as these can help you get a higher open rate. getemoji.com
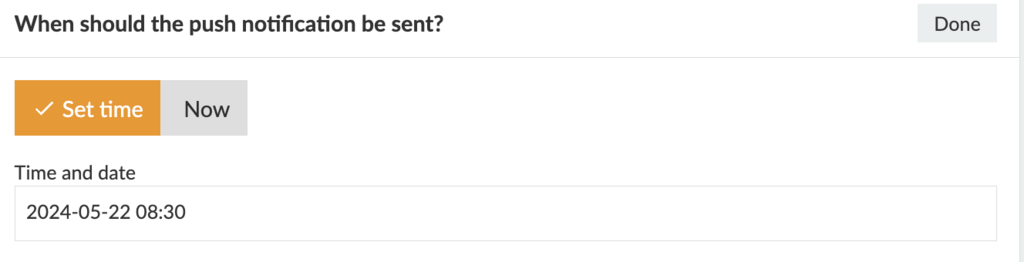
7. set the time to send the push notification
The last step is to set the time when the push notification will be sent. You can choose a specific date and time, or click 'Send Now' if you want it to be sent immediately after approval.
8. Change the 'Draft' toggle button to 'Approved for delivery'
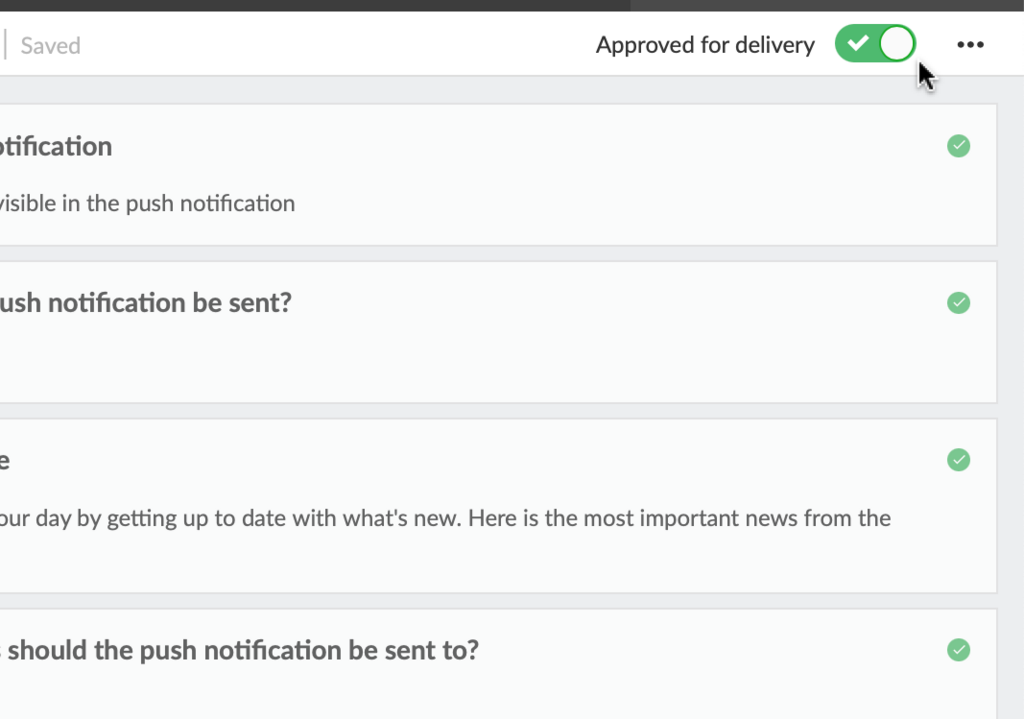
Well done! You have now scheduled your first push notification!
 with Abicart