 Dansk
Dansk
 Deutsch
 Español
 Français
 Italiano
 Norsk
Norsk
 Polski
 Português
 Suomi
Suomi
 Svenska
How to create a service account for android in-app purchases
Art. no. 216101915

We recommend that the following steps are made in an Incognito Window. This will prevent the system from switching between the web browser user and the Play Console User.
Step1. Sign in to https://console.cloud.google.com/project with your Play Console credentials (the ones used for creating your Google Developer Account).
Step2. Click on "Create Project" (if you have a project already, you can continue to step 4).
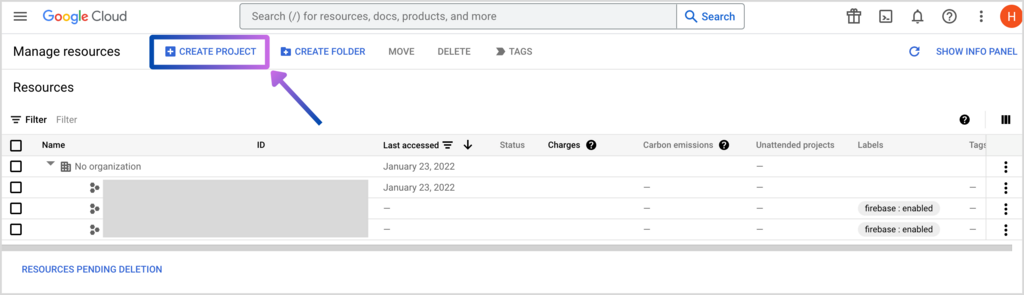
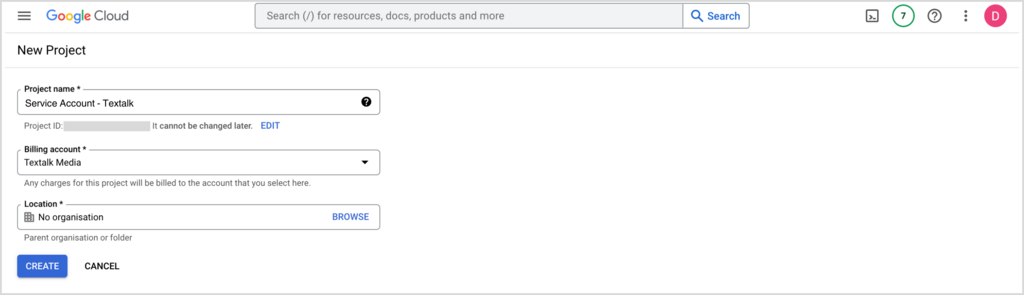
Step 3. Add a Project Name (for ex: Service Account - Company Name) , Billing Account (Company Name) and Location, click Create to continue.
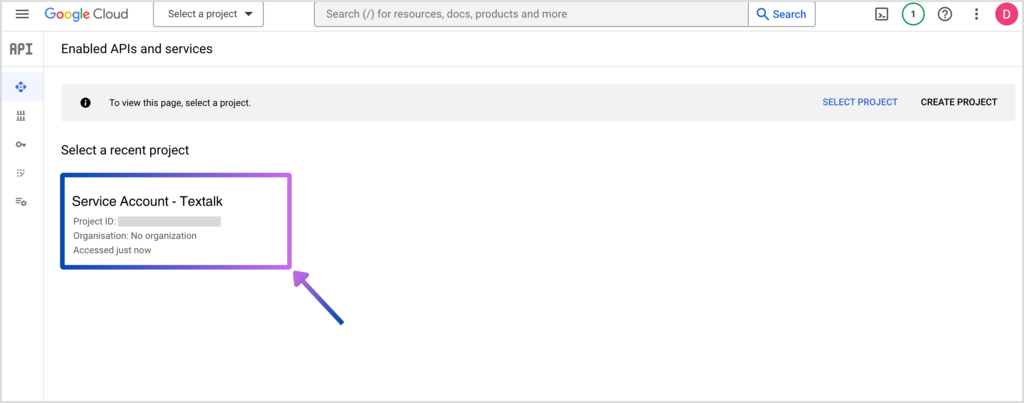
Step 4. Go to https://console.developers.google.com/apis/api/androidpublisher.googleapis.com/ and click on your recently created project.
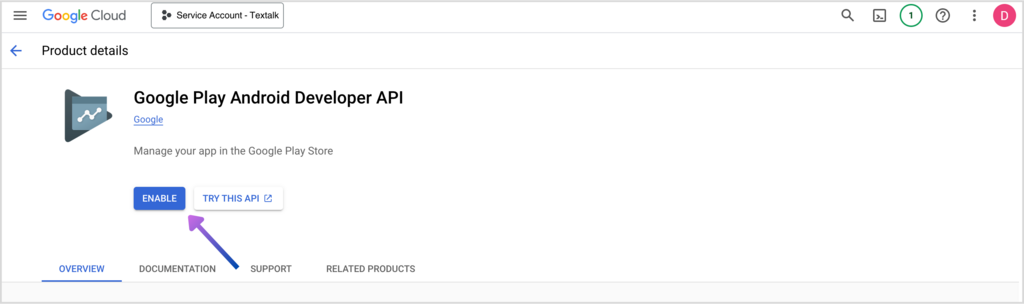
Step 5. Click on "Enable".
Step 6. You will land on the page below, continue to step 7 without doing anything here.

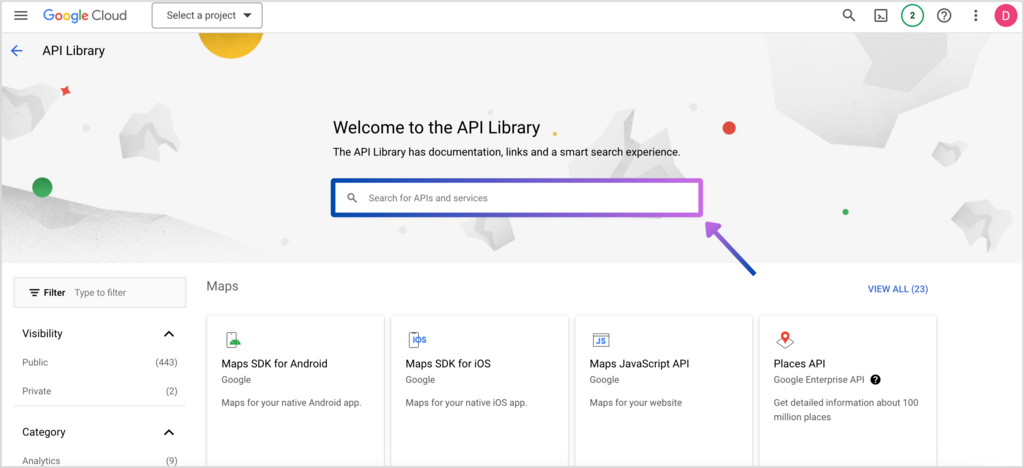
Step 7. Go to https://console.cloud.google.com/apis/library

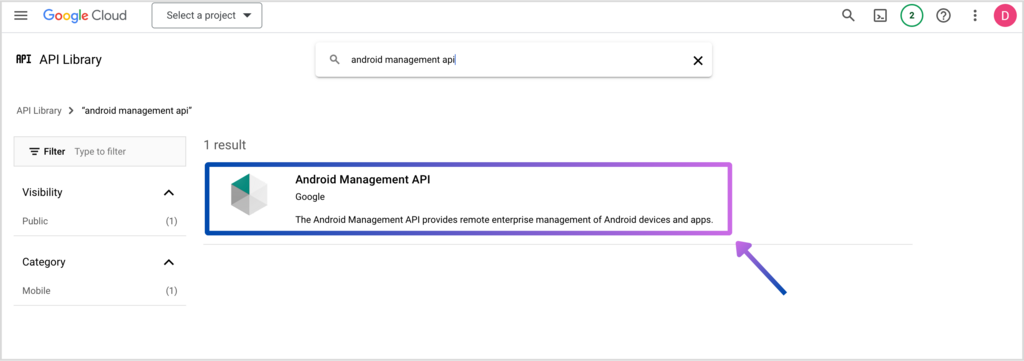
Step 8. Search for "Android Management API"
Step 9. Click on "Android Management API".
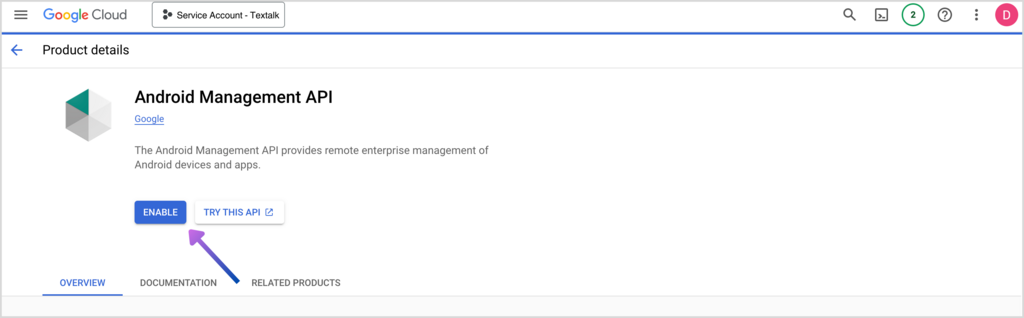
Step 10. Click on "Enable", the page will load, and the status will be changed to Enabled on the page you land on - continue to step 11 without doing anything there.
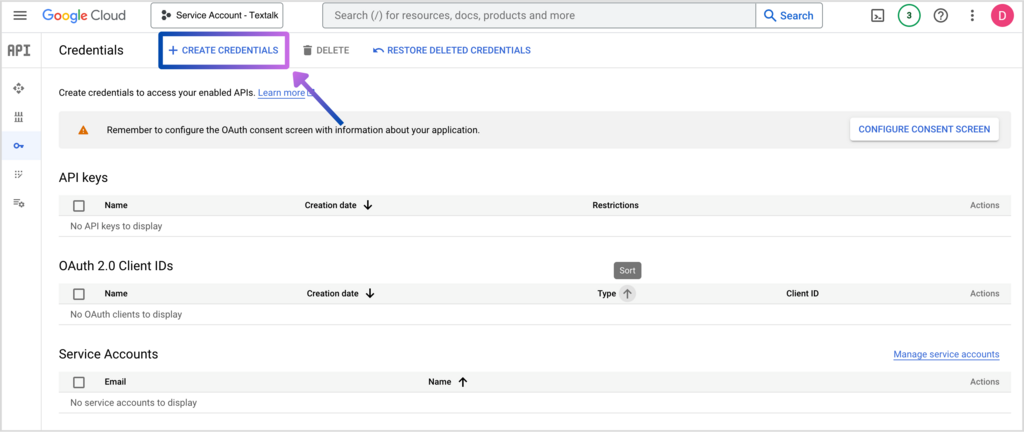
Step 11. Go to https://console.developers.google.com/project/_/apiui/credential and select you project.
Step 12. Click "Create Credentials" and choose "Service Account".
Step 13. Enter a name for the service account and click "Create and Continue". A service account ID and an email is generated. Save the email-adress for step 20. (The name of the account can be anything you want, but should be a name you will recognise its use for, ex: IAP = In-App Product).
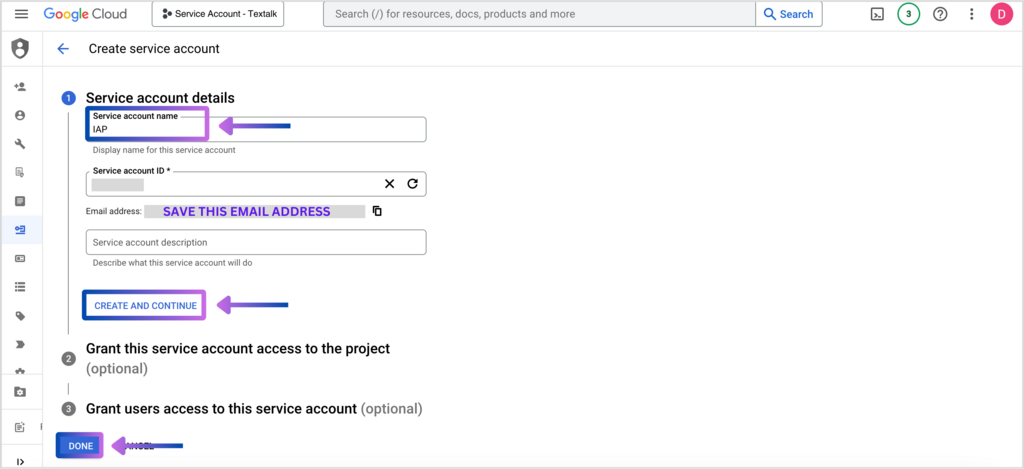
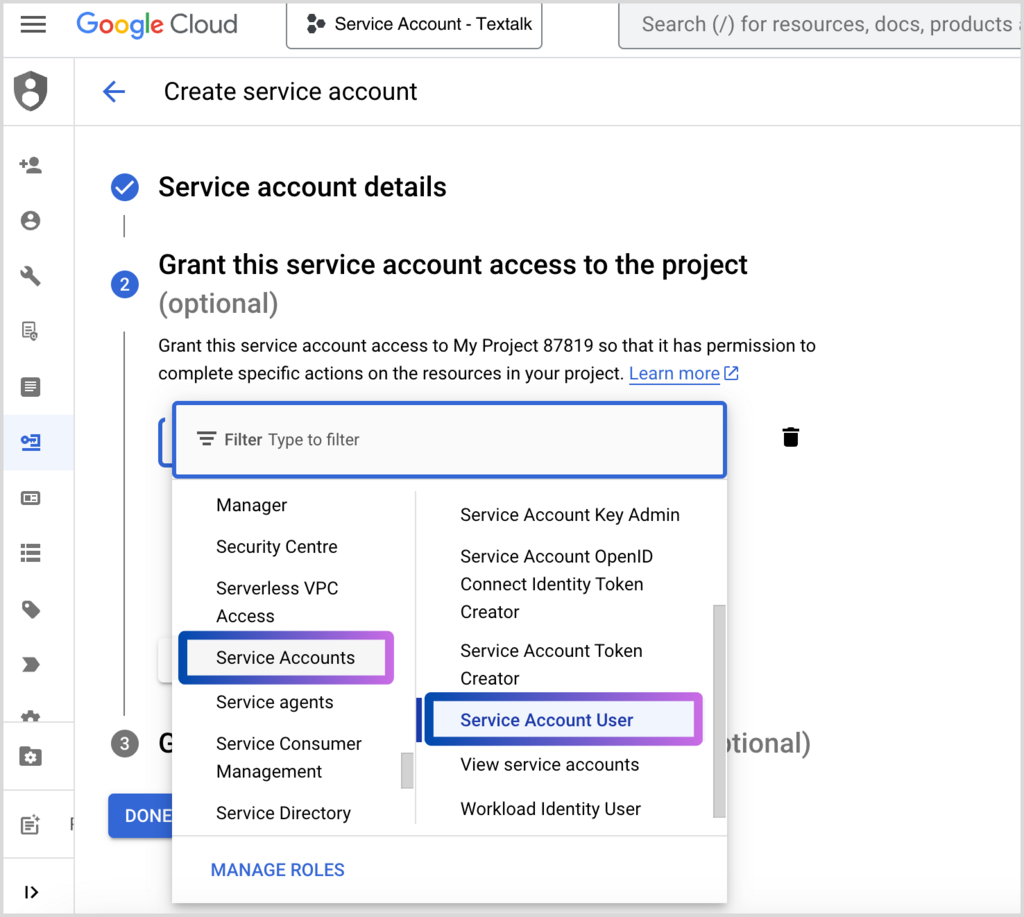
Step 14. Add the role "Service account user", found under "Service Accounts". Click on "Done".
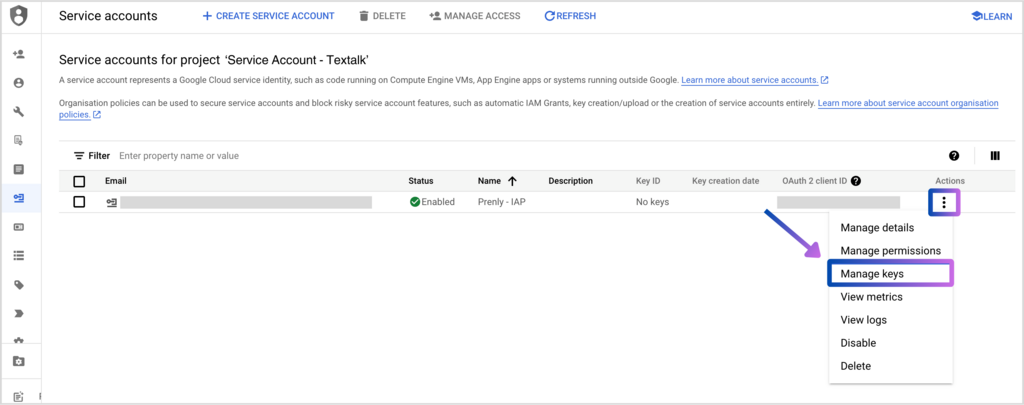
Step 15. Click on "Manage Service Accounts".

Step 16. In the tabular view that lists the service account, click on the three dots under "Actions", and select "Manage keys".
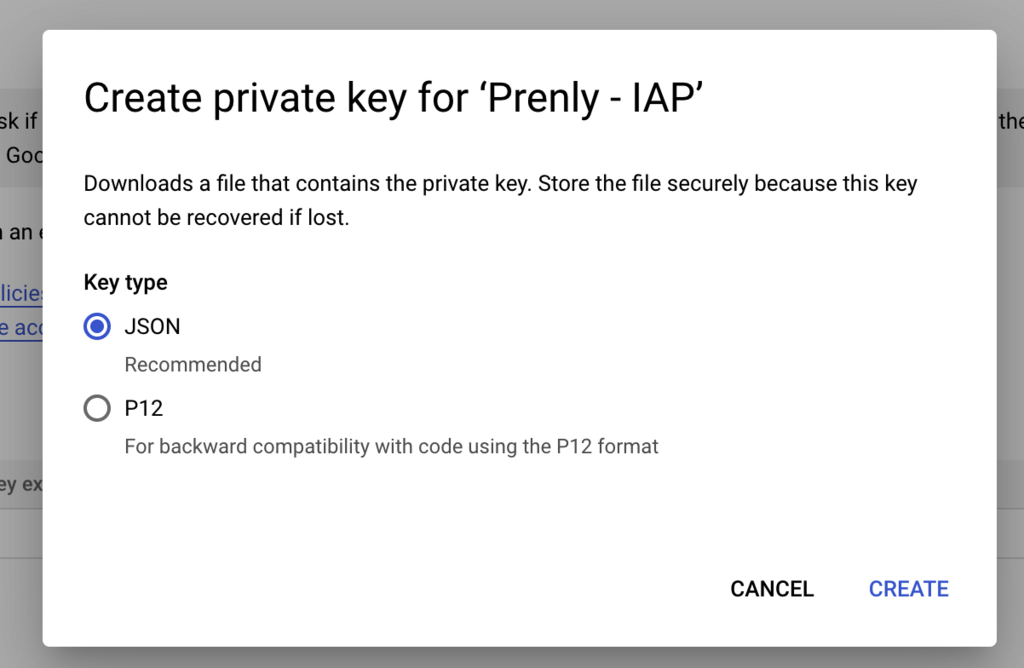
Step17. Click on the drop-down "Add key" and then click "Create new key".

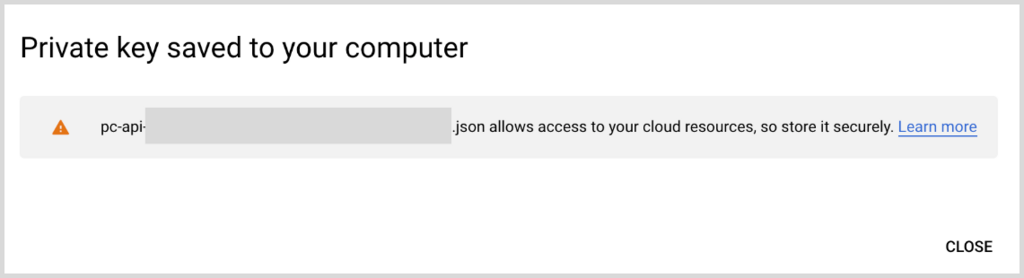
Step18. Select "JSON" and click Create".
A key is now created and saved to your computer, this can only be done once. A tip is to take note of the name to easier locate the key amongst your downloads.
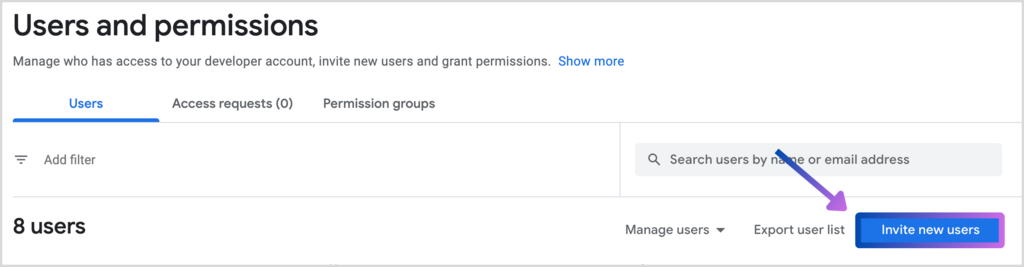
Step 19. Go tohttps://play.google.com/console/users-and-permissions and click on "Invite new user".
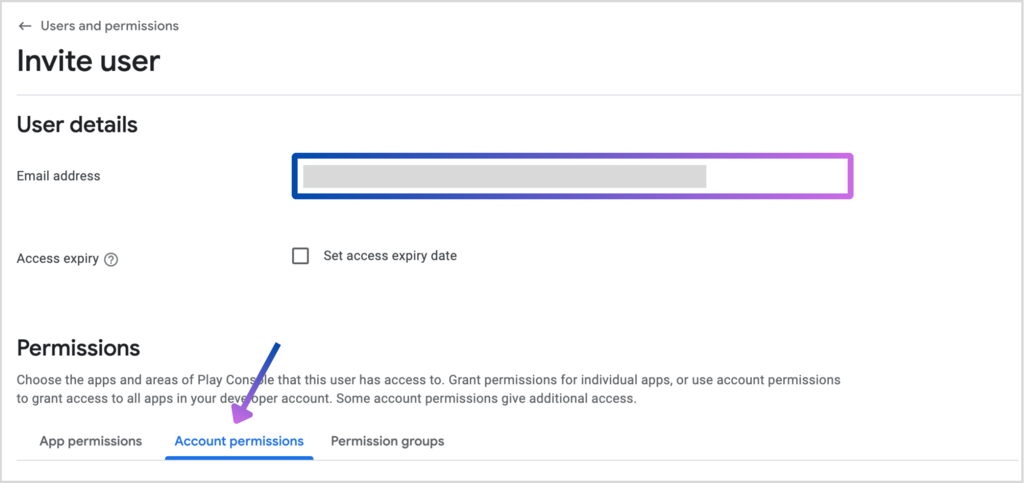
Step 20. Add the email from step 13, do not add an expiry date, continue to the Account Permission tab and select the two permissions
• "View app information and download bulk reports"
Found under the "App access"-section.
• "View financial data, orders and cancellation survey responses"
Found under the "Financial data"-section.
Google will automatically select additional permissions for you by selecting the required permissions.
Click on "Invite User" to save.
A tip! If you have other apps on your developer account you can limit the access by selecting "App permissions" instead of "Account Permissions".
Select "Add app" and choose the app, select "Apply" and then select the app-specific permissions
• "View app information (read only)"
Found under the "App access"-section.
• "View financial data"
Found under the "Financial data"-section.
Google will automatically select additional permissions for you by selecting the required permissions.
Click on "Apply" to save the permissions and, if not done before, click on "Invite User" to invite the user.
Step 21. E-mail the created key (JSON file) to hello@prenly.com
State in the email that the key is to be used for In-App Purchases and for which app it is for.
 with Abicart