 Dansk
Dansk
 Deutsch
 Español
 Français
 Italiano
 Norsk
Norsk
 Polski
 Português
 Suomi
Suomi
 Svenska
Create a CMP module
Art. no. 216092275

Creating a CMP module
According to new digital laws, all websites and Android/iOS apps must have a consent dialog box for the collection of cookies and other personal data. This is easily done using a CMP (Consent Management Platform) module that you create in Prenly Workspace. Here we show you how!
You can also use external CMP platforms where we currently support Didomi, Cookiebot, Usercentrics and Sourcepoint. Read more here.
Contact our support to activate the desired CMP module in Prenly Workspace.
Please note that you need to be an owner with full rights to be able to create these modules and modify the consent dialogs.
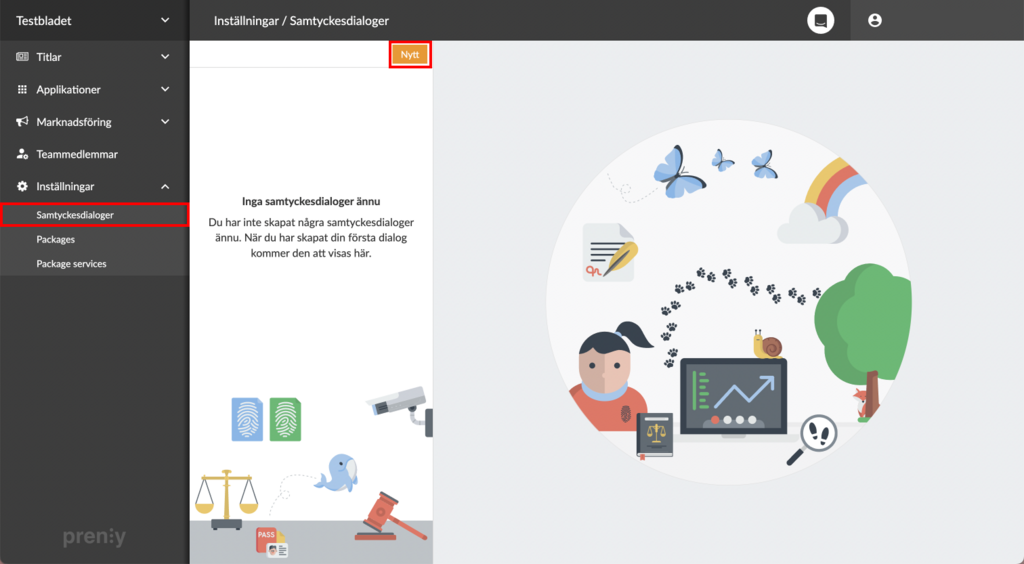
Create a new CMP module in Settings -> Consent dialogs.
Start by logging in to Prenly Workspace and go to Settings -> Consent dialogs -> Click on New.
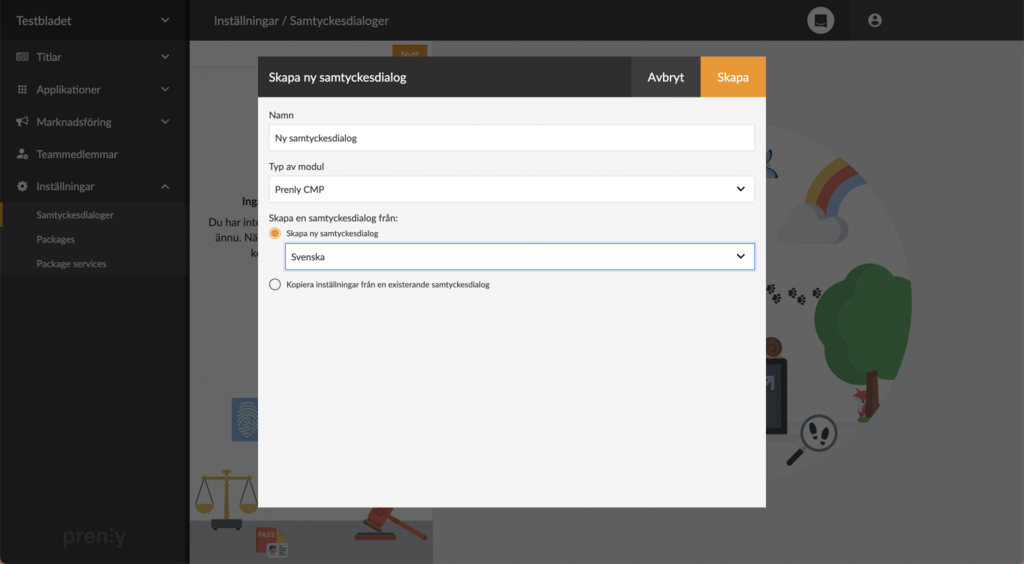
Name and select the type and language of the new module.
A window will come up in which the module is created. Start by filling in its desired name. Then select the type of module you want to use.(Prenly CMP is the default, but you can also choose Didomi, Cookiebot or Usercentrics if these are used by your company.) Finally, choose whether you want to generate a completely new standard dialog text (and then also which language) or whether you want to copy the dialog from a previously created module. Then press Create to create the module.

Setting up the module is as easy as counting to three!
Once the module is created, it will appear in the list of available modules. If we click on a module in this list, we can see which clients it is connected to and add new connections.
Here we can also edit the module name and title - and largely configure the content by scrolling further down the page. Next to each segment are helpful explanations that we can read by clicking on the question mark buttons or the three-dot menus further down. By using the three-dot menus, we also have the possibility to restore each segment to its original text.
If we want to save the changes made, we click on the green Save button in the top right corner. To delete a module, we find this option when we click on the three-dot menu next to the Save button.
Should the module already be connected to a client when we want to save our changes, the next step will be affected depending on how extensive our changes are. If we try to save larger changes, a new consent from the users will be required. If, on the other hand, we only correct a misspelling or similar, the changes will simply be saved in the module without requiring a new consent.
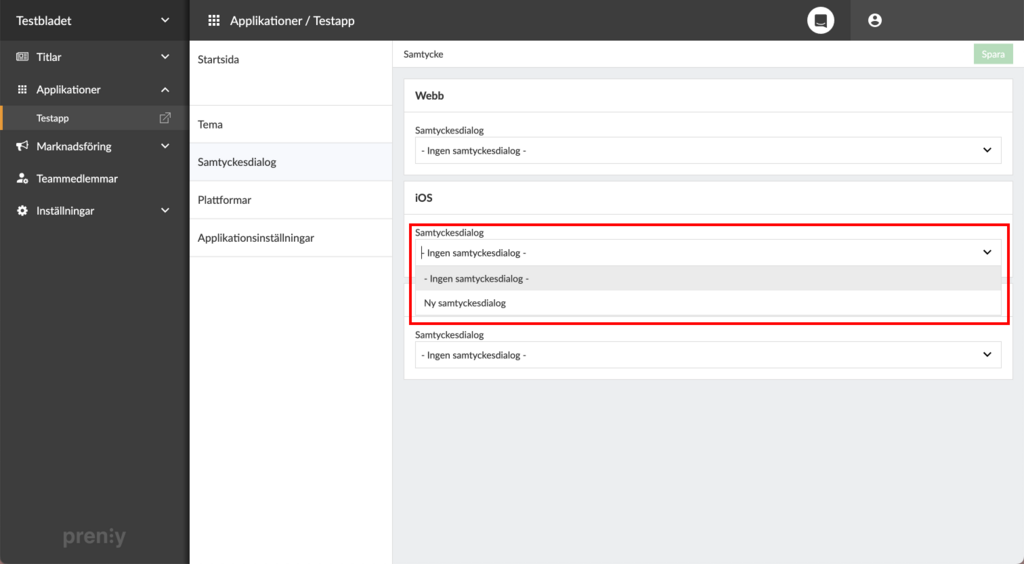
Go to your application -> Consent dialog to connect the app to the new module.
To pair the newly created module with an application, we go to Applications -> select an application -> Consent dialog. Next, we easily pair any client( Android/iOS/Web) with a consent dialog by selecting the module in the respective client's list. Finally, save the new connection with the green Save button in the top right corner. All done!
Please note that the consent dialog will not appear on the mobile applications until they have been updated to version 11.0.4 (Android) and 10.0.0 (iOS). For the web app, on the other hand, the dialog will appear immediately.
For those who use Google Tag Manager
If your e-magazine uses its own Google Tag Manager container to send statistics for the e-magazine, you need to ensure that the user's consent in Prenly CMP is respected.
This instruction assumes that you are familiar with Google Tag Manager.
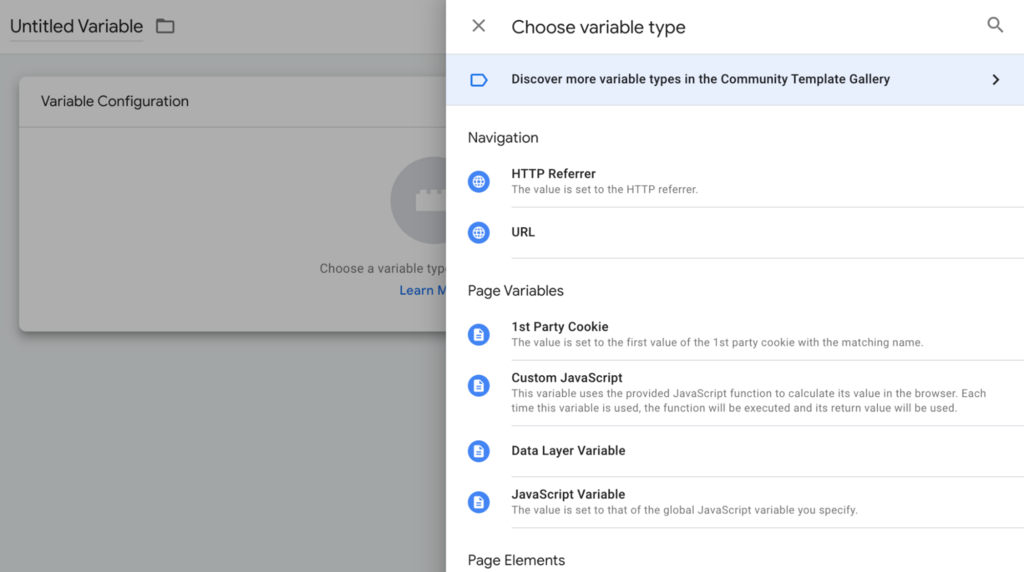
Step 1. Create a new variable
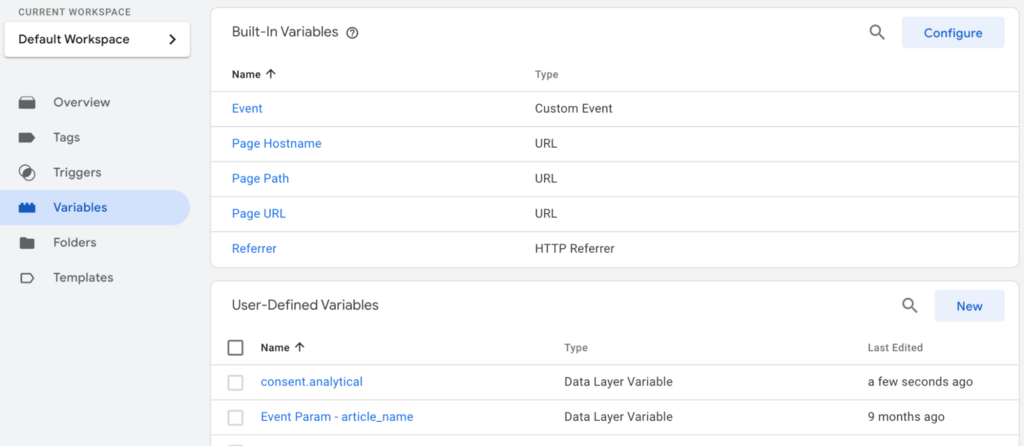
Click on "Variables" in the left menu.
Go to "User-defined variables" and press "New"

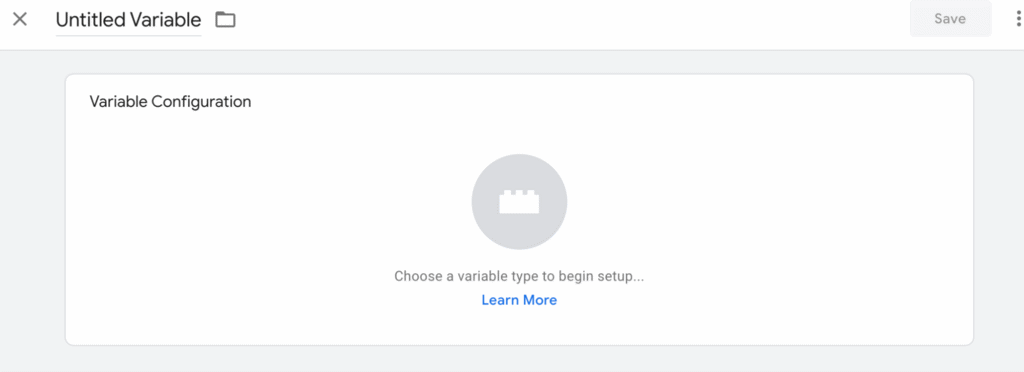
Select the variable type "Data Layer Variable"
Select the variable type "Data Layer Variable"
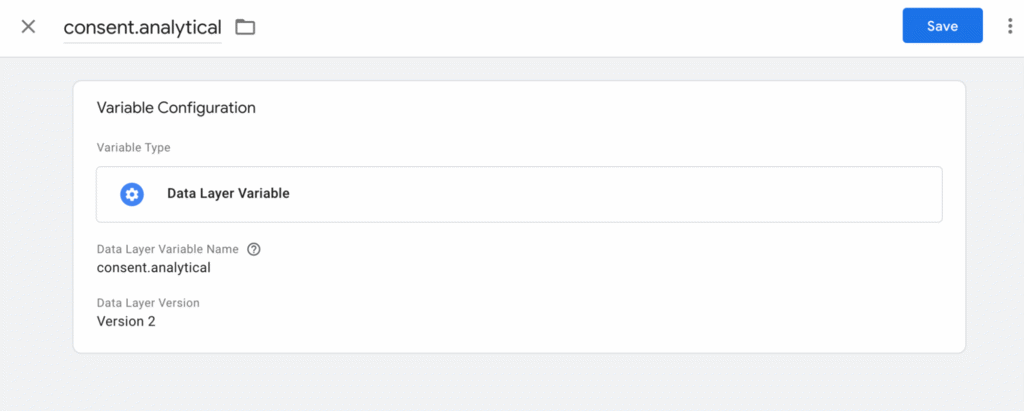
Type "consent.analytical" in the field for "Data Layer Variable Name"
Also enter "consent.analytical" as the name at the top.
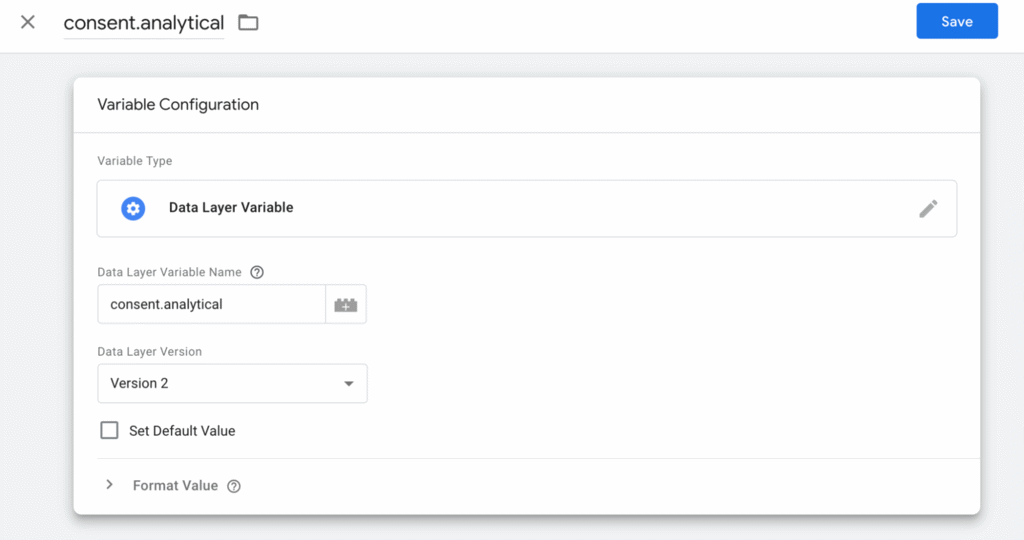
Tap on the box so that it expands and you can select "Format value"
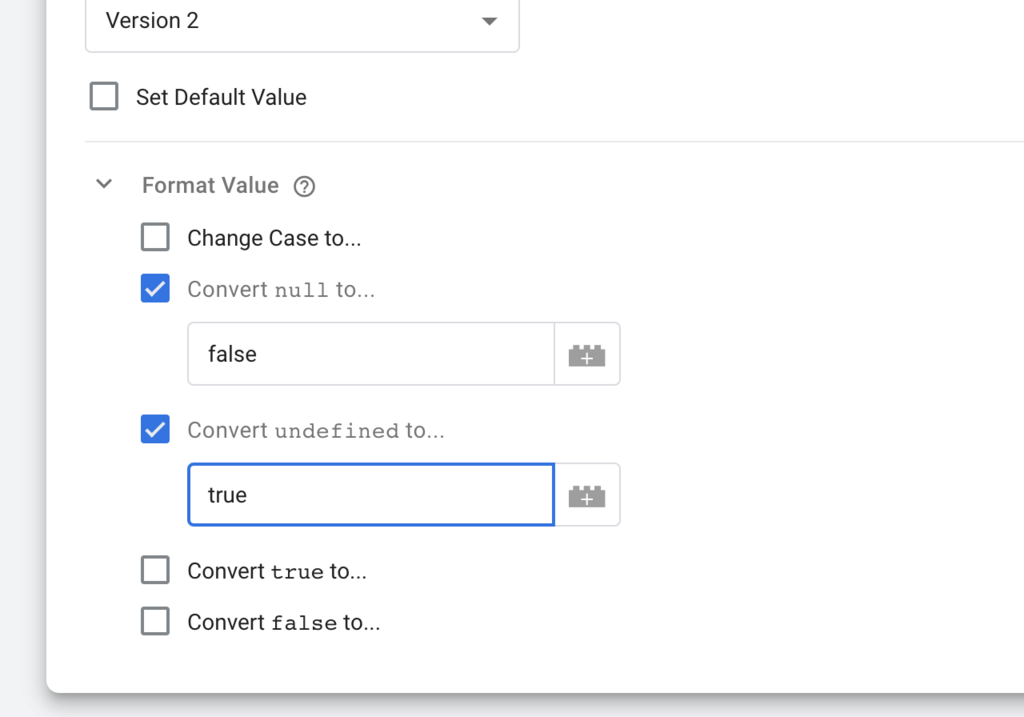
Set the format value so that the value "null" is set to "false" and the value "undefined" is set to "true".
Press "Save".
You have now created your data warehouse variable. It will appear in the list of "user-defined variables".
Step 2. Set up your triggers
Now set your triggers to include the variable as a condition.
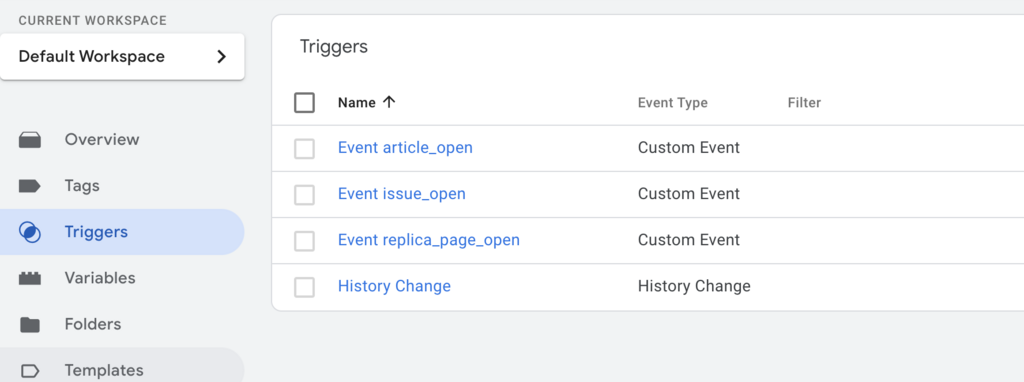
Click on "Triggers" in the left menu.
Open each trigger and add a condition that "consent.analytics" should be set to "true". This means that the visitor's choice to reject analytics is respected.
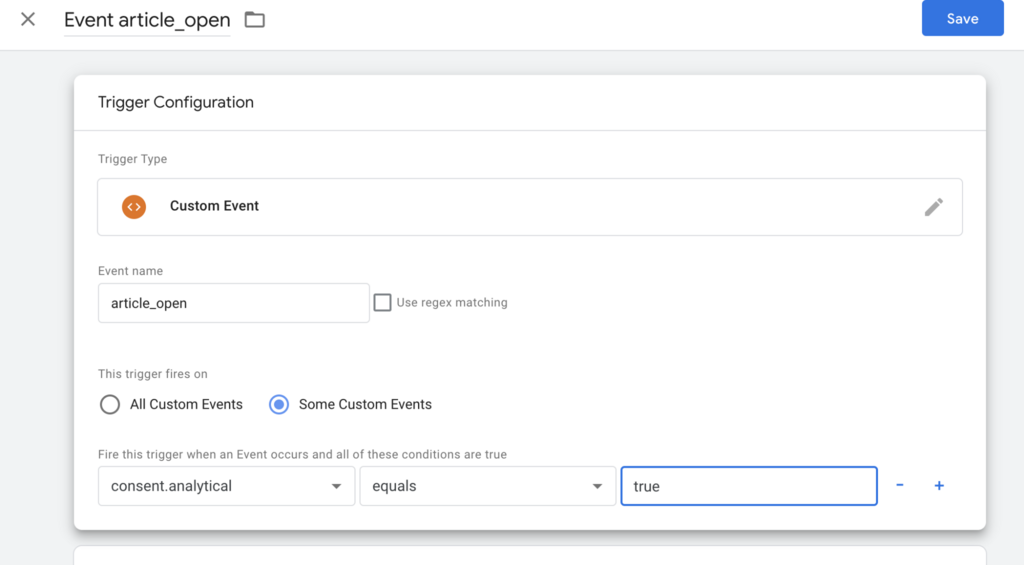
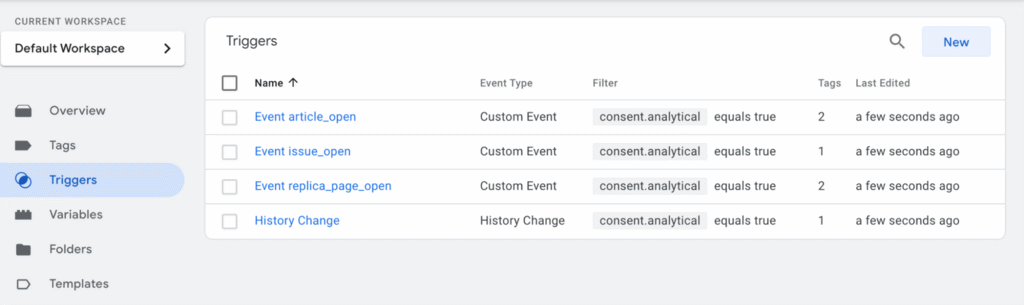
Add this condition to all your triggers. Save them.
Check that all triggers have this condition.
Step 3. Preview and publish your container
If you have not yet added the Prenly CMP module to Workspace, the statistics will work as usual.
Once you have added the Prenly CMP module, statistics will not be sent from those users who have chosen to reject statistics in their privacy settings.
If you are using other types of tags, there are also data warehouse variables for "consent.marketing" and "consent.functional".
The instruction above only applies if you use your own GTM container that you administer yourself. You must then configure GTM before activating the CMP module in Prenly Workspace.
If you use Prenly's Google Tag Manager container GTM-5B22TM, this configuration is done by us at Textalk Media. The same applies if your statistics are sent via Firebase for web. In these cases, you only need to activate the CMP module in Workspace.
 with Abicart